googleblue.texRead-only preview
% Written by Bibby AI
% !TEX program = xelatex
%%%
%%% @author:  WisdomFusion <WisdomFusion@gmailcom>
%%% @version: 1.2

\documentclass[aspectratio=169,utf8]{ctexbeamer}
% use beamer if english only
% aspectratio: 1610, 169, 149, 54, 43 and 32
% By default, it is to 128mm by 96mm, 4:3

\usepackage[english]{babel}
\usepackage{graphicx,hyperref,googleblue}
\usepackage{xcolor}
\usepackage{braket}
\usepackage{listings}
\usepackage{tabularx,multicol,multirow}
\usepackage{wrapfig}

\lstset{language=[LaTeX]TeX,
  upquote,
  keepspaces=true,
  columns=spaceflexible,
  numbers=none,
  basicstyle=\ttfamily\scriptsize,
  numberstyle=\color{gray}\ttfamily\tiny,
  keywordstyle=\color{blue}\ttfamily,
  stringstyle=\color{red}\ttfamily,
  commentstyle=\color{teal}\ttfamily,
  emphstyle=\color{blue}\bfseries,
  frame=none,
  escapeinside=``
}

\usepackage{multicol}
\setlength\columnsep{10pt} % This is the default columnsep

\usepackage{setspace}


\usepackage{fontspec}

\setmainfont[Ligatures=TeX]{Minion Pro}
\setsansfont{Myriad Pro}
\setmonofont{Courier Std}

\setCJKmainfont[BoldFont={Source Han Sans SC Medium}, ItalicFont={Adobe Kaiti Std}, BoldItalicFont={Adobe Fangsong Std}]{Source Han Sans SC}
%\setCJKmainfont[BoldFont=STHeiti,ItalicFont=STKaiti]{STHeiti}
%\setCJKsansfont[BoldFont=STHeiti]{STXihei}
%\setCJKmonofont{STKaiti}

\setbeamercovered{transparent}


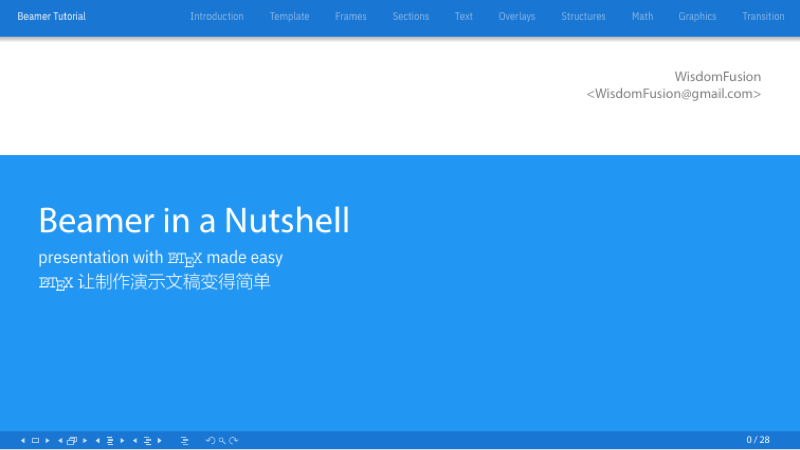
\title[Beamer Tutorial]{Beamer in a Nutshell}
\subtitle{presentation with \texttt{\LaTeX} made easy\\ \texttt{\LaTeX} 让制作演示文稿变得简单}
\author[WisdomFusion]{\scriptsize \textcolor{gray}{WisdomFusion\\ <WisdomFusion@gmail.com>}}
\date{May, $2018$}


\begin{document}

\addtocounter{framenumber}{-1}


\begin{frame}
  \titlepage
\end{frame}

\begin{frame}
  \frametitle{Outline}

  \centering

  \begin{minipage}{.75\textwidth}
    % \doublespacing
    % \onehalfspacing
    \setstretch{1.5}

    \begin{columns}[t]
      \begin{column}{.5\textwidth}
        \tableofcontents[sections={1-5}]
      \end{column}
      \begin{column}{.5\textwidth}
        \tableofcontents[sections={6-10}]
      \end{column}
    \end{columns}

    \setstretch{1.5}
    % \singlespacing
  \end{minipage}

\end{frame}


\section{Introduction}

\begin{frame}
  \frametitle{What's Beamer?}

  \begin{itemize}
    \setlength{\itemsep}{8pt}
    \item Beamer is a fexible \LaTeX{} class for making slides and presentations.
    \item It supports functionality for making PDF slides complete with colors, overlays, environments, themes, transitions, etc.
    \item Adds a couple new features to the commands you've been working with.
  \end{itemize}

\end{frame}


\begin{frame}
  \frametitle{Advantages of Beamer}

  \begin{itemize}
    \setlength{\itemsep}{8pt}
    \item The standard commands of \LaTeX{} also work in Beamer. If you can write basic \LaTeX{}, you can easily make a Beamer presentation.
    \item You can easily create overlays, themes allow you to change the appearance of your presentation to suit your purposes.
    \item The layout, colors, and fonts used in a presentation can easily be changed globally, but you also have control over the most minute detail.
  \end{itemize}

\end{frame}


\begin{frame}
  \frametitle{Advantages of Beamer}

  \begin{itemize}
    \setlength{\itemsep}{8pt}
    \item Each theme is designed to be highly usable and readable. This makes the presentation more professional looking and easier for the audience to follow.
    \item The final output is typically a \alert{.pdf} file. Viewer applications for this format exist for virtually every platform.
    \item \alert{Your presentation will look exactly the same no matter which computer or viewer program is being used.}
  \end{itemize}

\end{frame}

\section{Template}

\begin{frame}[fragile=singleslide]
  \frametitle{Template}

  Basic Beamer file structure:

\begin{lstlisting}[language=TeX,multicols=2,basicstyle=\ttfamily\tiny,numbers=left]
% !TEX program = xelatex
\documentclass[aspectratio=169,UTF-8]{ctexbeamer}

\usepackage{graphicx,hyperref}
\usepackage{xcolor}
\usefonttheme{serif}
\usepackage{fontspec}
\setmainfont{Helvetica Neue}
\setCJKmainfont{PingFang SC}

\title[short title]{long title}
\subtitle[short subtitle]{long subtitle}
\author[short name]{long name}

\begin{document}
\begin{frame}
  \titlepage
\end{frame}
\begin{frame}
\frametitle{Outline}
  \tableofcontents
\end{frame}
\section{Some Section}
\begin{frame}
  \frametitle{Section Title}
  Section content
\end{frame}
% Written by Bibby AI
\end{document}
\end{lstlisting}

\end{frame}


\begin{frame}
  \frametitle{Insert Title Information}

  \begin{block}{Commands To Change}
    \texttt{
    \begin{itemize}
      \item
        \textbackslash{}title[\alert{short title}]\{\alert{long title}\}
      \item
        \textbackslash{}subtitle[\alert{short subtitle}]\{\alert{long subtitle}\}
      \item
        \textbackslash{}author[\alert{short name}]\{\alert{long name}\}
      \item
        \textbackslash{}date[\alert{short date}]\{\alert{long date}\}
      \item
        \textbackslash{}institution[\alert{short name}]\{\alert{long name}\}
      \end{itemize}
    }
  \end{block}

\end{frame}


\section{Frames}

\begin{frame}[fragile=singleslide]
  \frametitle{Frames}

  \begin{itemize}
    \setlength{\itemsep}{8pt}
    \item Each Beamer project is made up of a series of frames.
    \item Each frame produces one or more slides, depending on the slide's overlays, which will be discussed later.
  \end{itemize}

  \begin{block}{A Basic Frame}

\begin{lstlisting}
\begin{frame}[<alignment>]
  \frametitle{Frame Title Goes Here}
  Frame body text and/or LATEX code
\end{frame}
\end{lstlisting}

  \end{block}

\end{frame}


\begin{frame}[fragile=singleslide]
  \frametitle{Frames}

  \begin{itemize}
    \setlength{\itemsep}{8pt}
    \item Frames are very simple to make. Simply write your own text or \LaTeX{} code between the begin/end frame commands.
    \item The alignment option is centered \texttt{[c]} by default. The values \texttt{[t]} (top align) and \texttt{[b]} (bottom align) are also accepted.
  \end{itemize}

  \begin{block}{A Basic Frame}
\begin{lstlisting}
\begin{frame}[t]
  \frametitle{Algorithmic Combinatorics on Words}
  \textit{Words}, or strings of symbols over..
\end{frame}
\end{lstlisting}
  \end{block}

\end{frame}


\begin{frame}[fragile]
  \frametitle{Frames}

  \begin{itemize}
    \setlength{\itemsep}{8pt}
    \item The \texttt{[plain]} option for the frame environment causes the headlines, footlines, and sidebars to be suppressed. This can be useful for showing large pictures.
    \item If you already have a \LaTeX{} document, you can simply wrap \verb|\begin{frame}| and \verb|\end{frame}| commands around the information you want to present.
  \end{itemize}
\end{frame}

\begin{frame}
  \frametitle{Putting Frames Together}

  \begin{block}{Example}
    \tt \scriptsize

\textbackslash{}begin\{frame\}\\
\alert{\textbackslash{}titlepage}\\
\textbackslash{}end\{frame\}\\

\textbackslash{}begin\{frame\}\\
\alert{
\textbackslash{}frametitle\{Outline\}\\
\textbackslash{}tableofcontents[part=1,pausesections]
}\\
\textbackslash{}end\{frame\}\\

\textbackslash{}begin\{frame\}\\
\alert{\textbackslash{}frametitle\{Introduction\}}\\
Body text / code of the frame goes here.\\
\textbackslash{}end\{frame\}

  \end{block}
\end{frame}


\section{Sections}

\begin{frame}[fragile]
  \frametitle{Sections and Subsections}

  \begin{itemize}
    \setlength{\itemsep}{8pt}
    \item Presentations are divided into sections, subsections, and sub-subsections.
    \item Each call to the \verb|\section{section name}|, \verb|\subsection{subsection name}|, or \verb|\subsubsection{sub-subsection name}| command:
      \begin{itemize}
        \item Inserts a new entry into the table of contents at the appropriate tree-level.
        \item Inserts a new entry into the navigation bars.
        \item Does not create a frame heading.
      \end{itemize}
    \item Another version of the command, \verb|\subsection*{section name}|, only adds an entry in the navigation bars, \textit{not} the table of contents.
  \end{itemize}

\end{frame}

\begin{frame}[fragile=singleslide]
  \frametitle{Sections and Subsections}

  Section specifications are declared between the frames, so they have no direct effect on what is shown inside each frame.

  \begin{block}{Example}

\begin{lstlisting}
...
\end{frame}
\section{Fine and Wilf's Theorem}
\subsection{The Case of Two or Three Holes}
\subsubsection{Definition 3.7}
\begin{frame}
...
\end{lstlisting}

  \end{block}


\end{frame}


\section{Text}

\begin{frame}[fragile]
  \frametitle{Characters}

  \begin{itemize}
    \setlength{\itemsep}{8pt}
    \item \texttt{\textbackslash} and \texttt{\textbackslash{}par}
    \item \verb|\# \$ \% \& \{ \} \_ \~{} \~{} \textbackslash|
    \item \verb|` '| and \verb|`` ''|
    \item \verb|-|, \verb|--|, and \verb|---|
    \item \verb|\ldots|
    \item \verb|$\sim$|
  \end{itemize}
\end{frame}


\begin{frame}[fragile]
  \frametitle{Common Text Commands and Environments}

  You can use the same text commands and environments in Beamer that you do in \LaTeX{} to change the way your text is displayed.

  \begin{block}{Common Text Commands}
    \begin{tabular}{>{\arraybackslash}m{.5\textwidth} >{\arraybackslash}m{.5\textwidth}}
      \verb|\emph{Sample Text}|         & \emph{Sample Text}\\
      \verb|\textbf{Sample Text}|       & \textbf{Sample Text}\\
      \verb|\textit{Sample Text}|       & \textit{Sample Text}\\
      \verb|\textsl{Sample Text}|       & \textsl{Sample Text}\\
      \verb|\alert{Sample Text}|        & \alert{Sample Text}\\
      \verb|\textrm{Sample Text}|       & \textrm{Sample Text}\\
      \verb|\textsf{Sample Text}|       & \textsf{Sample Text}\\
      \verb|\color{green}{Sample Text}| & \color{green}{Sample Text}
    \end{tabular}
  \end{block}
\end{frame}

\begin{frame}[fragile]
  \frametitle{Verbatim Text}

  It is often helpful to write code or formulas as verbatim text, which shows the text exactly as you type it, without any \LaTeX{} formatting.

  \begin{itemize}
  \item For inline verbatim text, such as sample text, use the text command:\\
    \texttt{\textbackslash{}verb|sample text|}
  \item The verbatim environment is also available in Beamer and can be used in the same way as it is in \LaTeX{}:\\
\texttt{\textbackslash{}begin\{verbatim\}\\
  Sample text\\
\textbackslash{}end\{verbatim\}}
  \end{itemize}

  For either of these methods to work, the \alert{\texttt{[fragile]}} option must be added to the frame environment.

\end{frame}


\begin{frame}[fragile]
  \frametitle{Fonts}
  \begin{columns}[t]
    \begin{column}{.6\textwidth}
      \tiny
\begin{lstlisting}
\usepackage{fontspec}
%\setmainfont{Helvetica Neue}
\setmainfont{Arial}
\setCJKmainfont{Microsoft YaHei}
%\setCJKmainfont[BoldFont=STHeiti]{STHeiti}
%\setCJKsansfont[BoldFont=STHeiti]{STHeiti}
%\setCJKmonofont{STKaiti}
\end{lstlisting}
    \end{column}
    \begin{column}{.4\textwidth}

      \begin{tabularx}{\textwidth}{l}
        \tiny{\verb|\tiny|}\\
        \scriptsize{\verb|\scriptsize|}\\
        \footnotesize{\verb|\footnotesize|}\\
        \small{\verb|\small|}\\
        \normalsize{\verb|\normalsize|}\\
        \large{\verb|\large|}\\
        \Large{\verb|\Large|}\\
        \LARGE{\verb|\LARGE|}\\
        \huge{\verb|\huge|}\\
        \Huge{\verb|\Huge|}
      \end{tabularx}

    \end{column}
  \end{columns}

\end{frame}


\begin{frame}[fragile]
  \frametitle{Alightment}

  \begin{itemize}
    \setlength{\itemsep}{8pt}
    \item \verb|\begin{center}| \ldots \verb|\end{center}|
    \item \verb|\begin{flushleft}| \ldots \verb|\end{flushleft}|
    \item \verb|\begin{flushright}| \ldots \verb|\end{flushright}|
    \item \verb|\centering \raggedright \raggedleft|
  \end{itemize}

\end{frame}

\begin{frame}[fragile]
  \frametitle{Spacing}

  \begin{itemize}
    \setlength{\itemsep}{8pt}
    \item A vertical space can be indicated by using the \verb|\vskip<number>pt| command. For example, \verb|\vskip15pt| will produce a 15 point vertical space
    \item Horizontal spaces are indicated similarly with the command \verb|\hskip<number>pt|
    \item Horizontal spaces are useful for indenting text or graphics
    \item Other measurements can also be used, such as centimeters: \verb|\vskip2cm|
    \item Negative values can also be used to squeeze text or graphics together: \verb|\vskip-10pt| or \verb|\hskip-1cm|
  \end{itemize}

\end{frame}


\section{Overlays}

\begin{frame}
  \frametitle{Overlays}

  \begin{itemize}
    \item Having parts of your slides appear incrementally aids the audience by bringing their attention to the information that is currently being discussed.
    \item In Beamer, \alert{overlays} control the order in which parts of the frame appear.
  \end{itemize}
\end{frame}

\begin{frame}[fragile]
  \frametitle{Overlays - Pause}

  An easy way to implement an overlay is to place the \verb|\pause| command between the parts you want to show up separately.

  For example, you could separate three items like this:

  \vskip10pt

\textbf{Step 1:} Step1
\pause

\textbf{Step 2:} Step2
\pause

\textbf{Step 3:} Step3

\end{frame}


\begin{frame}
  \frametitle{Overlays - Specifications}

  \begin{itemize}
  \item Overlay specifications are given in pointed brackets (\texttt{<},\texttt{>}) and indicate which slide the corresponding information should appear on.
  \item The specification \texttt{<1->} means display from slide 1 on. \texttt{<1-3>} means display from slide 1 to slide 3.
  \end{itemize}

  \begin{block}{Example}

    \begin{itemize}
      \item<1> $abcadcabca$
      \item<1-2> $abcabcabca$
      \item<1> $bacabacaba$
      \item<1,3> $cacdaccacc$
    \end{itemize}

  \end{block}

\end{frame}


\section{Structures}

\begin{frame}[fragile]
  \frametitle{Structure - Tables}


    \begin{columns}
    \begin{column}{.7\textwidth}
      \small
\begin{lstlisting}
\begin{tabular}{|c|r|r|}
  \hline
  \multirow{2}*{姓名} & \multicolumn{2}{c|}{成绩}\\
  \cline{2-3}
                     & 语文 & 数学\\
  \hline
  张三                & 87 & 100\\
  \hline
\end{tabular}
\end{lstlisting}
    \end{column}
    \begin{column}{.3\textwidth}
        \begin{tabular}{|c|r|r|}
          \hline
          \multirow{2}*{姓名} & \multicolumn{2}{c|}{成绩}\\
          \cline{2-3}
                             & 语文 & 数学\\
          \hline
          张三                & 87 & 100\\
          \hline
        \end{tabular}
    \end{column}
  \end{columns}

\end{frame}


\begin{frame}[fragile]
  \frametitle{Structure - Columns}

  \centering

\begin{lstlisting}
\begin{columns}[t]
  \begin{column}{.5\textwidth}
    col1
  \end{column}
  \begin{column}{.5\textwidth}
    col2
  \end{column}
\end{columns}
\end{lstlisting}


\end{frame}


\begin{frame}
  \frametitle{Structure - Boxes}

  \centering
  \colorbox{yellow}{黄色盒子}
  \quad
  \colorbox{red}{红色盒子}
  \quad
  \colorbox{green}{绿色盒子}
  \quad
  \colorbox{blue}{\textcolor{white}{蓝色盒子}}
\end{frame}


\section{Math}

\begin{frame}
  \frametitle{Math}

  \begin{wrapfigure}{r}{0.2\textwidth}
    \begin{figure}[t]
      \centering
      \includegraphics{./figs/taipei101.jpg}
    \end{figure}
  \end{wrapfigure}

  The mass-energy equivalence is described by the famous equation

  $$E=mc^2$$

  discovered in 1905 by Albert Einstein. In natural units ($c=1$), the formula expresses the identity

  \begin{equation}
    E=m
  \end{equation}

\end{frame}


\section{Graphics}

\begin{frame}
  \frametitle{Graphics}

  \centering

  $\vcenter{\hbox{\includegraphics[width=1cm]{./figs/GitHub-Mark-120px-plus.png}}}$
  \qquad
  $\vcenter{\hbox{\includegraphics[width=2cm]{./figs/mactexlogoX5.png}}}$

  \vskip5ex

  \huge{\LaTeX}

\end{frame}


\section{Transition}

\begin{frame}
  \frametitle{Transition}
  \transboxin

  This page has transition effect when PDF entering presentation mode, this works perfectly in Adobe Acrobat Reader or  Adobe Acrobat DC, other PDF viewers, ermmmmm \ldots

  \begin{itemize}
    \item The PDF format offers a standardized way of defining transition effects from one slide to the next. For example, whatever was shown before the slide with the transition effect may dissolve to uncover the new slide.
    \item These effects should be used sparingly as to not distract from the content of the presentation.
    \item Be forewarned, different PDF viewers have different interpretations and levels of support for these effects.
  \end{itemize}
\end{frame}


\begin{frame}
  \frametitle{Frame Transition Commands}

  \begin{description}[labelindent=0pt, labelwidth=6cm]
    \scriptsize
    \item[\texttt{\textbackslash{}transblindshorizontal}] Horizontal blinds pulled away
    \item[\texttt{\textbackslash{}transblindsvertical}] Vertical blinds pulled away
    \item[\texttt{\textbackslash{}transboxin}] Move to center from all sides
    \item[\texttt{\textbackslash{}transboxout}] Move to all sides from center
    \item[\texttt{\textbackslash{}transdissolve}] Slowly dissolve what was shown before
    \item[\texttt{\textbackslash{}transglitter}] Glitter sweeps in specified direction
    \item[\texttt{\textbackslash{}transslipverticalin}] Sweeps two vertical lines in
    \item[\texttt{\textbackslash{}transslipverticalout}] Sweeps two vertical lines out
    \item[\texttt{\textbackslash{}transhorizontalin}] Sweeps two horizontal lines in
    \item[\texttt{\textbackslash{}transhorizontalout}] Sweeps two horizontal lines out
    \item[\texttt{\textbackslash{}transwipe}] Sweeps single line in specified direction
    \item[\texttt{\textbackslash{}transduration\{2\}}] Show slide specified number of seconds
  \end{description}

\end{frame}


\addtocounter{framenumber}{-1}


\setbeamercolor{background canvas}{bg=matblue}
\setbeamercolor{normal text}{fg=white}
\setbeamertemplate{navigation symbols}{}
\begin{frame}[plain, b]
  \centering
  \Large \textcolor{white}{Thanks.}
  \normalsize

  \vspace*{\fill}

  \begin{beamercolorbox}[wd=\paperwidth]{section in head/foot}
    \centering
    \vskip3pt
    {\small Beamer -- powerful, flexible and nice-looking presentations}
    \vskip8pt
  \end{beamercolorbox}

\end{frame}


\end{document}


%%% Local Variables:
%%% mode: latex
%%% TeX-master: t
%%% End:
Preview

PDF Preview
Create an account to compile and preview