uictman.texRead-only preview
% Written by Bibby AI
%
\documentclass{uicthesi}
\usepackage{newlfont}
\usepackage{amsfonts}
\usepackage{amssymb}
\usepackage{euler}

%
% This is the user manual for UICTHESI CLS.
% Document date 1/10/92 (phd)
% Updated to include information on equation numbering 6/25/92 (phd)
%
% Updated to compile under LaTeX version 2e 2/21/96
%
% The material below is needed only for this document, not normally in
% a thesis prepared with this style file.
%
\def\new@fontshape#1#2#3#4#5{\expandafter
     \edef\csname#1/#2/#3\endcsname{\expandafter\noexpand
                                 \csname #4\endcsname}}
\new@fontshape{cmr}{bx}{sc}{
      <5>cmcsc8 at 5pt%
      <6>cmcsc8 at 6pt%
      <7>cmcsc8 at 7pt%
      <8>cmcsc8%
      <9>cmcsc9%
      <10>cmcsc10%
      <11>cmcsc10 at 10.95pt%
      <12>cmcsc10 at 12pt%
      <14>cmcsc10 at 14.4pt%
      <17>cmcsc10 at 17.28%
      <20>cmcsc10 at 20.736pt%
      <25>cmcsc10 at 24.8832pt%
      }{}
\mathversion{normal}
\newcommand{\ams}{{$\cal{A}\cal{M}\cal{S}$}}
\newcommand{\amslatex}{{$\cal{A}\cal{M}\cal{S}$-\LaTeX{}}}
\newcommand{\amstex}{{$\cal{A}\cal{M}\cal{S}$-\TeX{}}}
\newcommand{\BibTeX}{{\rm B\kern-.05em{\sc i\kern-.025em b}\kern-.08em
    T\kern-.1667em\lower.7ex\hbox{E}\kern-.125emX}}
\newcommand{\uicthesi}{{$\mathbb{UICTHESI}$}}

\newcommand\bs{\char '134 }   % A backslash character for \tt font
\newcommand{\lb}{\char '173 } % A left brace character for \tt font
\newcommand{\rb}{\char '175 } % A right brace character for \tt font


% one or two other commands
\def\newfont#1#2{\@ifdefinable #1{\font #1=#2\relax}}
\def\symbol#1{\char #1\relax}


\begin{document}
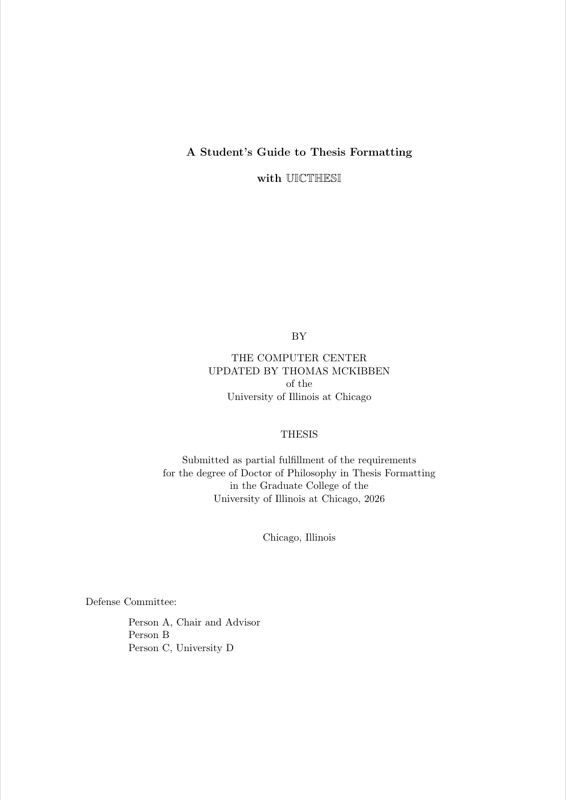
\title{A Student's Guide to Thesis Formatting \\with \uicthesi{}}
\author{The Computer Center\\updated by Thomas McKibben}
\pdegrees{of the\\University of Illinois at Chicago}
\degree{Doctor of Philosophy in Thesis Formatting}
\committee{Person A, Chair and Advisor \\ Person B \\ Person C, University D}


\maketitle
\copyrightpage
\dedication
The dedication is optional, but if it is desired, the proper format for
it is created with the command \verb+\dedication+ followed by the
text of the dedication.
It untitled and does not appear in the Table of Contents.

\acknowledgment
The acknowledgment is optional, but if it is desired, the
proper format for it is created with the command \verb+\acknowledgment+
followed by the text of the acknowledgment.
The title {\bf ACKNOWLEDGMENT} will be centered at the top of the page.
Subsequent pages will have the heading {\bf ACKNOWLEDGMENT (continued)}.
If more than a single person is being acknowledged, the command should
be given as \verb+\acknowledgments+.  The section title and continued
page headings will then be the plural {\bf ACKNOWLEDGMENTS} and
{\bf ACKNOWLEDGMENTS (continued)}.
It will not appear in the Table of Contents.
To create the indented signature, include the line
\verb+\initials{XXX}+, where \verb+XXX+ are the initials of the author.
\initials{SSS}

\preface
The preface is optional, but if it is desired, the
proper format for it is created with the command \verb+\preface+
followed by the text of the preface.
The title {\bf PREFACE} will be centered at the top of the page.
Subsequent pages will have the heading {\bf PREFACE (continued)}.
It will not appear in the Table of Contents.


This document is intended to introduce the student and prospective
dissertation writer to the use of the \uicthesi{} system
for preparing a dissertation meeting the format requirements
of the Graduate College of the University of Illinois at Chicago.
It is based on the \LaTeX{} document preparation system, which in turn
is based on the \TeX{} typesetting system.
\TeX{} is a powerful text formatter which is especially suited for
technical works involving a lot of mathematics. It was developed
by a mathematics professor at Stanford for the publication of his
own books.
\LaTeX{} is a {\em macro} facility built on top of \TeX{} that,
while providing the typesetting power of \TeX{}, allows a user to
describe the organization of his work in logical rather than
physical terms.
To create a chapter heading, for instance, the user of \TeX{} must
provide the appropriate spacing, centering, and font size information.
A writer using \LaTeX{}
needs only to provide the text of the chapter heading.
The \LaTeX{} system already knows the physical commands needed to
format the chapter heading correctly.
This is made possible by the creation of a {\em style file} which
defines for the user just those physical instructions required for each
of the logical parts of the paper.
Those who have used Waterloo SCRIPT at UIC may be familiar with
a similar facility within that program called GML.

\uicthesi{} is a non-standard document style file, locally developed to
enable students at UIC to prepare dissertations that conform to the
requirements of the Graduate College.
For several years, we have had a thesis formatting system at UIC
based on the GML facility of Waterloo SCRIPT.
That system {\tt UICTHESI SCRIPT}
remains and in fact it has been recently upgraded.
However, some users may find that it is unsatisfactory for their
use, especially those in technical fields, where a large part of
their work consists of complex mathematical expressions. This may also be
the case for personal computer based word processors such as Word, and
WordPerfect which do not handle large documents containing graphics with
very much grace.
\uicthesi{} is a style file intended to meet the needs of those users.
The \uicthesi{} system is, however, suitable for preparing theses
in any field whether they require complex mathematical
typesetting capabilities or not.

This is not an exhaustive description of \TeX{} or \LaTeX{}.
It provides only the {\em essential} information that you
will need in order to use \uicthesi{}.
Only very basic features of \LaTeX{} are covered, and a
vast amount of detail has been omitted. In particular, many features of the new \LaTeX{} $2_\epsilon$ standard are omitted. In a document of this size
it is not possible to include everything that you might need to know.
If you intend to make extensive use \uicthesi{} you should
refer to a more complete reference.  Attempting to produce complex
documents using only the information found below will require
much more work than it should, and will probably produce a less
than satisfactory result.

This document does, however, cover the features specific to \uicthesi{}.
This document is itself a creation of the \uicthesi{} system.
The source of the document, \verb+UICTMAN TEX+, is an excellent
example of how to use the system. This has been updated for use with
\LaTeX{}$2_\epsilon$ which is the current standard.

The primary reference for \LaTeX{} is {\underl The \LaTeX{} User's Guide
and Reference Manual & }\cite{latex_guide}.
It contains just about all the information that you will ever
need to know about \LaTeX, and you will need access to a copy if
you are to use \LaTeX{} or \uicthesi{} successfully.
The book {\underl \LaTeX{} for Scientists and
Engineers & }\cite{latex_engineers}
is also a valuable general reference.
Web surfers will find CTAN, the Comprehensive \TeX\ Archive Network a
particularly rich source of information and tools. Use Netscape, the IBM
Web Explorer for OS/2 or other web browser to link to
http://jasper.ora.com/ctan.html.

Important site-specific references you should read are available
through {\tt INFORM} on UICVM.  The most important of these documents are
{\underl Using \TeX{} at UIC & }\cite{use_tex},
{\underl Using \LaTeX{} at UIC & }\cite{use_latex},
{\underl Mainframe \TeX{} Version 3.1 and Related
Software & }\cite{tex31}, and
{\underl \TeX{}, \LaTeX{}, and \amstex{} Output on the Xerox 8790s
at UIC (TeXRoX) & }\cite{texrox}. If you are preparing your thesis on
a personal computer, then be sure to read the documentation that came
with your \TeX{} software.

The authoritative reference for thesis formatting at UIC is published
by the Graduate College\cite{thesis_dir}.
\uicthesi{} is an attempt to assist the student to conform to
those requirements,
but the Graduate College publication is the final authority in such
matters where this document and Graduate College requirements
differ.

This document incorporates information from a number of sources,
including {\underl Essential \LaTeX{} & }\cite{warbrick}
by Jon Warbrick of Plymoth Polytechnic, UK.

\tableofcontents
\listoftables
\listoffigures

\listofabbreviations
\begin{list}
{}
{\setlength
   {\labelwidth}{1in}
    \setlength{\leftmargin}{1.5in}
    \setlength{\labelsep}{.5in}
    \setlength{\rightmargin}{\leftmargin}}
\item[AMS\hfill] American Mathematical Society
\item[CTAN\hfill] Comprehensive \TeX\ Archive Network
\item[TUG\hfill] \TeX\ Users Group
\item[UIC\hfill] University of Illinois at Chicago
\item[UICTHESI\hfill] Thesis formatting system for use at UIC.
\end{list}

\summary
A summary is required.
The proper format for it is created with the command \verb+\summary+
followed by the text of the summary.
The title {\bf SUMMARY} will be centered at the top of the page.
Subsequent pages will have the heading {\bf SUMMARY (continued)}.
It will not appear in the Table of Contents.

\chapter{\LaTeX{}}\label{sec:styles}
Before there was \uicthesi{}, there was \LaTeX{}.
The \LaTeX{} system is still present on UICVM; \uicthesi{}
depends on it.
Before you can use it, you must give the command GETDISK TEX.
This will allow the user access to the newest version (3.1) of
\TeX{} and \LaTeX{}, which includes the \ams{} extensions.

A document to be prepared with \LaTeX{} should be created
with a text editor, such as {\tt XEDIT} on UICVM, {\ttfamily
 emacs} on TIGGER or ICARUS or your favorite editor if you are
using EM \TeX{} under DOS or OS/2 on a PC or Oz \TeX{} on a Mac.
If you choose to use a word processor such as DeScribe, Word, or
WordPerfect, be sure to save your files in ASCII format which is
plain text.
Any combination of 8 or less characters acceptable to UICVM as
a file name may be used, but the file type must be {\tt TEX}. Unix,
OS/2, Windows NT, and Windows 95 all allow file names with more
than 8 characters, however your implementation of \LaTeX{} may not
so it is best to stick to 8 or less until you are sure.
To create the document once the {\tt TEX} file has been created,
enter the command \verb+LATEX <fn>+, where \verb+<fn>+ is the
file name.  The \LaTeX{} processor will create several files,
including a file with the same file name but with the extension
\verb+DVI+.  The \verb+DVI+ file may be printed with the
\verb+PRINTTEX+ printer driver, i.e.{} \verb+PRINTTEX <fn>+.

The rest of this chapter is a brief discussion of standard \LaTeX{}.
For those readers familiar with the workings of \LaTeX{}, and
who wish to get right to material about \uicthesi{}, you may
skip to the next chapter.

\section{Standard Document Styles}
\LaTeX{} provides a number of standard {\em document styles\/}
that determine exactly how a document will be formatted.
Rather than occupying the student with mechanical concerns about
how your thesis should be laid out, \LaTeX{} instructions allow students
to describe its {\em logical structure\/}.
For example, you can think of a quotation embedded within your
text as an element of this logical structure: you would normally expect
a quotation to be displayed in a recognizable style to set it
off from the rest of the text.
A human typesetter would recognize the quotation and handle
it accordingly, but since \LaTeX{} is only a computer program,
it requires your help.
The \LaTeX{} system provides a command that allows the writer to
identify quotations and allow \LaTeX{} to typeset them correctly.

There are a number of good reasons for concentrating on the logical
structure rather than on the appearance of a document.  It prevents
you from making elementary typographical errors in the mistaken
idea that they improve the aesthetics of a document---you should
remember that the primary function of document design is to make
documents easier to read, not prettier.  It is more flexible, since
you only need to alter the definition of the quotation style
to change the appearance of all the quotations in a document.  Most
important of all, logical design encourages better writing.
A visual system makes it easier to create visual effects rather than
a coherent structure; logical design encourages you to concentrate on
your writing and makes it harder to use formatting as a substitute
for good writing.

There are four standard document styles available in \LaTeX:
\nobreak
\begin{description}

\item[{\em article}] intended for short documents and articles for
publication.
Articles do not have chapters, and when \verb+\maketitle+ is used to
generate a title (see Section~\ref{sec:title}) it appears at the top
of the first page rather than on a page of its own.

\item[{\em report}] intended for longer technical documents.
It is similar to {\tt article}, except that
it contains chapters and the title appears on a page of its own.

\item[{\em book}] intended as a basis for book publication.
Page layout is
adjusted assuming that the output will eventually be used to print on
both sides of the paper.

\item[{\em letter}] intended for producing personal letters.  This style
will allow you to produce all the elements of a well laid out letter:
addresses, date, signature, etc.
\end{description}

These standard styles can be modified by a number of
{\em style options\/}.
They appear in square brackets after the \verb+\documentstyle+ command.
Only one style can be used at a time, but you can have more than one
style option, in which case their names should be separated by commas.
The standard style options are:
\begin{description}

\item[{\em 11pt}]  prints the document using eleven-point type for the
running text rather that the ten-point type normally used.
Eleven-point type is about ten percent larger than ten-point.

\item[{\em 12pt}] prints the document using twelve-point type for
the running text
rather than the ten-point type normally used. Twelve-point type is about
twenty percent larger than ten-point.

\item[{\em twoside}] causes documents in the article or report styles
to be formatted for printing on both sides of the paper.
This is the default for the book style.

\item[{\em titlepage}] causes the \verb+\maketitle+ command to generate a
title on a separate page for documents in the {\tt article} style.
A separate page is always used in both the {\tt report} and {\tt book}
styles\footnote{Because file names on UICVM are limited to 8
characters, this option is named {\tt titlepag}.}.
\end{description}
\section{\amslatex{} Document Styles}
The current version of \LaTeX{} at UIC supports \amslatex{}.
Included with \amslatex{} are several new document styles:
{\tt amsart} and {\tt amsbook}.
These are similar to the standard \LaTeX{} styles {\tt article} and
{\tt book}, except that they have been specially modified to meet the
article and book requirements of AMS.  For further information on
these styles, see the document {\underl \amslatex{} Version 1.0
User's Guide & }\cite{amsltx}.

\chapter{Getting Started with \uicthesi}

\section{Overall Structure}
Some \LaTeX{} commands must appear in every document.
The actual text of the document always starts with
\verb+\begin{document}+ and ends with \verb+% Written by Bibby AI
\end{document}+.
Everything that comes
before the \verb+\begin{document}+ command is called the
{\em preamble\/}. The preamble can only contain \LaTeX{} commands
to describe the document's style.
Anything that comes after the \verb+\end{document}+ command is ignored.

One command that must appear in the preamble is the
\verb+\documentclass+ command.
This command specifies the overall style for the document.
The standard styles are described earlier in this document.
The most important style for the student preparing a thesis at UIC
is \uicthesi{}.
This file, and the document that you wish to prepare with \uicthesi{},
are initiated by using the command \verb+\documentclass{uicthesi}+
Normally, no style options are required.
What would be style options for the standard document styles,
such as options for double spacing or for a titlepage,
are already built into \uicthesi{}.
When using \uicthesi{}, the default type size is 11~point.
Unlike the standard \LaTeX{} document styles,
there is no option to change the
default typesize to either 10~points or 12~points.
11~point size is acceptable by the graduate college.
If the special symbols or fonts included in the \ams{} font collection
are required, include the style option \verb+amssymb+, in the document
style declaration, i.e.{} \verb+\documentclass[amssymb]{uicthesi}+

\section{Running Text}
Most documents consist almost entirely of running text---words formed
into sentences, which are in turn formed into paragraphs.
Describing running text poses no problems, you just type
it in naturally. In the output that it produces, \LaTeX{} and \uicthesi{}
will fill lines and adjust the
spacing between words to give tidy left and right margins.
The spacing and distribution of the words in your input
file will have no effect at all on the eventual output.
Any number of spaces in your input file
are treated as a single space by \LaTeX{}, it also regards the
end of each line as a space between words.
A new paragraph is
indicated by a blank line in your input file, so don't leave
any blank lines unless you really wish to start a paragraph.

\LaTeX{} reserves a number of the less common keyboard characters for its
own use. The ten characters
\begin{quote}\begin{verbatim}
#  $  %  &  ~  _  ^  \  {  }
\end{verbatim}\end{quote}
should not appear as part of your text, because if they do
\LaTeX{} will get confused.

\section{\LaTeX{} and \uicthesi{} Commands}
There are a number of words in any \LaTeX{} document that
start `\verb+\+'.
These are \LaTeX{} {\em commands\/} and they describe the structure
of your document.
There are a number of things that you should realize about these
commands:
\begin{enumerate}

\item All \LaTeX{} commands consist of a `\verb+\+' followed by one
or more characters.

\item \LaTeX{} commands should be typed using the correct mixture of
upper- and lower-case letters.
\verb+\BEGIN+ is {\em not\/} the same as \verb+\begin+.

\item Some commands are placed within your text.  These are used to
switch things, like different typestyles, on and off.
The \verb+\em+ command is used like this to emphasize text, normally
by changing to an {\it italic\/} typestyle.
The command and the text are always enclosed between
`\verb+{+' and `\verb+}+'---the `\verb+{+' turns the effect on and
and the `\verb+}+' turns it off.
So when I write \verb+{\em emphasized text}+,
I get {\em emphasized text}.

\item There are other commands that look like
\begin{quote}\begin{verbatim}
\command{text}
\end{verbatim}\end{quote}
In this case the text is called the ``argument'' of the command.  The
\verb+\section+ command is like
this\footnote{The command to create footnotes is like this also.
Just give the command {\tt $\backslash$footnote$\{$...text...$\}$} where
{\tt ...text...} is the text of the footnote.}.
Sometimes you have to use curly brackets `\verb+{}+' to enclose the
argument, sometimes square brackets `\verb+[]+', and sometimes
both at
once\footnote{Note that the footnotes start with 1 for each page
and that the text of the footnote is single spaced at the bottom
of the same page.}.
There is method behind this apparent madness, but for the
time being you should be sure to copy the commands exactly as given.

\item When a command's name is made up entirely of letters, you must
make sure that the end of the command is marked by something that
isn't a letter.
This is usually either the opening bracket around the command's
argument, or it's a space.
When it's a space, that space is always ignored by \LaTeX. We
will see later that this can sometimes be a problem.

\end{enumerate}

\section{Other Things to Look At}
\LaTeX{} can print both opening and closing quote characters,
and can manage either of these either single or double.
To do this, it uses the two quote characters from your keyboard:
{\tt `} and {\tt '}.
You will probably think of
{\tt '} as the ordinary single quote character which probably looks like
{\tt\symbol{'23}} or {\tt\symbol{'15}} on your keyboard,
and {\tt `} as a ``funny''
character that probably appears as {\tt\symbol{'22}}.
You type these characters once for single quote, and twice for
double quotes. The double quote character {\tt "} itself
is almost never used.

\LaTeX{} can produce three different kinds of dashes.
A long dash, for use as a punctuation symbol, as is typed as three dash
characters in a row, like this `\verb+---+'.  A shorter dash,
used between numbers as in `10--20', is typed as two dash
characters in a row, while a single dash character is used as a hyphen.

From time to time you will need to include one or more of the \LaTeX{}
special symbols in your text.  Seven of them can be printed by
making them into commands.
To do this precede them with a backslash.
The remaining three symbols can be produced by more
advanced commands, as can symbols that do not appear on your keyboard
such as \dag, \ddag, \S, \pounds, \copyright, $\sharp$ and $\clubsuit$.

It is sometimes useful to include comments in a \LaTeX{} file, to remind
you of what you have done or why you did it.  Everything to the
right of a \verb+%+ sign is ignored by \LaTeX{}, and so it can
be used to introduce a comment.

The use of underlining is rarely seen in fine text, but the
UIC Graduate College thesis formatting requirements are derived from
manuscript form, rather than the form for a finished document.
Underlining is commonly found in such manuscripts, especially in place
of italics for emphasis.
\uicthesi{} automatically underlines section titles and those items in the
bibliography which, in finished text form, would appear in italics.
To underline an arbitrary piece of text, use the \verb+\underl+ command
as follows:
\begin{quote}\begin{verbatim}
{\underl This is text to be underlined & }
\end{verbatim}\end{quote}
The ampersand marks the place where the underlining is to end.
{\underl Note that the underlining will break for the end of lines
and wrap around & }.
The brackets at surrounding the command and the space before and after
the terminating \verb+&+ are required.

\section{Front Matter}
\subsection{Title Page}\label{sec:title}
A thesis at UIC must have a title page.
To prepare a title page for a \uicthesi{} thesis, you include
commands {\underl in the preamble & } to identify the title
\begin{quote}\verb+\title{Advances in Thesis Formatting}+\end{quote}
the author
\begin{quote}\verb+\author{Samuel S. Student}+\end{quote}
the author's prior degrees
\begin{quote}\verb+\pdegrees{B.S.University of Hither}+\end{quote}
and the degree for which the thesis is written
\begin{quote}\verb+\degree{Doctor of Philosophy in Pool}+\end{quote}
\uicthesi{} automatically produces the title and author's name
in all upper case letters
even if the writer enters them in mixed upper and lower case.
Immediately after the \verb+\begin{document}+, include the command
\verb+\maketitle+.
\ref{fig:titlepage} is an example of how to produce a title page.
\begin{figure}
\footnotesize
\begin{minipage}[t]{0.48\textwidth}
\begin{verbatim}
\title{Advances in Thesis Formatting}
\author{Samuel S. Student}
\pdegrees{B.S.University of Hither,1983\\
M.S.University of Thither,1985\\
M.A.University of Yon,1986}
\degree{Doctor of Philosophy in Pool}
...
\maketitle
\end{verbatim}
\end{minipage}\hfill
\begin{minipage}[t]{0.48\textwidth}
\begin{center}
\begin{singlespace}
{\normalsize ADVANCES IN THESIS FORMATTING}\\[12ex]
BY\\[1ex]
SAMUEL S. STUDENT\\B.S.University of Hither, 1983\\
M.S.University of Thither, 1985\\M.A.University of Yon, 1986\\[6ex]
THESIS\\[2ex]
Submitted in partial fulfillment of the requirements\\
for the degree of Doctor of Philosophy in Pool\\
in the Graduate College of the\\
University of Illinois at Chicago, 1996\\[4ex]
Chicago, Illinois
\end{singlespace}
\end{center}
\end{minipage}
\vspace{1em}
\caption{Creating a titlepage}\label{fig:titlepage}
\end{figure}

If you are not using \uicthesi{} but are using one of the standard \LaTeX{}
styles, the \verb+\degree+ and \verb+\pdegrees+ fields are omitted
but a \verb+\date+ field is included.
In the \verb+report+, \verb+book+ and \uicthesi{} style,
a full page title page is created, but
in the {\tt article} style it normally appears at the top
of the first page, the style option {\tt titlepage} will alter this (see
Section~\ref{sec:styles}).

\subsection{Preliminary Sections}
\subsubsection{Creating a Copyright Page}
The optional copyright page is produced by including the line
\verb+\copyrightpage+ just after \verb+\maketitle+.

\subsubsection{Creating a Dedication}
The dedication is optional, but if it is desired, the proper format for
it is created with the command \verb+\dedication+ followed by the
text of the dedication.
It untitled and does not appear in the Table of Contents.

\subsubsection{Creating an Acknowledgment}
The acknowledgment is optional, but if it is desired, the
proper format for it is created with the command \verb+\acknowledgment+
followed by the text of the acknowledgment.
The title {\bf ACKNOWLEDGMENT} will be centered at the top of the page.
Subsequent pages will have the heading {\bf ACKNOWLEDGMENT (continued)}.
If more than a single person is being acknowledged, the command should
be given as \verb+\acknowledgments+.  The section title and continued
page headings will then be the plural {\bf ACKNOWLEDGMENTS} and
{\bf ACKNOWLEDGMENTS (continued)}.
It will not appear in the Table of Contents.
To create the indented signature, include the line
\verb+\initials{XXX}+, where \verb+XXX+ are the initials of the author.

\subsubsection{Creating a Preface}
The preface is optional, but if it is desired, the
proper format for it is created with the command \verb+\preface+
followed by the text of the preface.
The title {\bf PREFACE} will be centered across the page.
Subsequent pages will have the title {\bf PREFACE (continued)}.
It will not appear in the table of contents.

\subsubsection{Creating the Table of Contents
and Lists of Figures and Tables}
\label{sec:toclflt}
Including the command \verb|\tableofcontents| in your document will cause
a contents list to be included, containing information collected from
the various sectioning commands as described in \ref{sec:section}.
You will notice that each time your document is run through \uicthesi{}
the table of contents is always made up of the headings from
the previous version of the document.
This is because \uicthesi{} collects information for the table as
it processes the document, and then includes it
the next time it is run.
This can sometimes mean that the document has to be
processed through \uicthesi{} twice to get a correct table of contents.
At the present time, only the numbered style of table of contents
is available.  The mixed letter and numbered style of section
identification is not available.
The title {\bf TABLE OF CONTENTS} will be centered at the
top of the page.
Any pages after the first page will have a
{\bf TABLE OF CONTENTS (Continued)} heading.

The commands \verb+\listoffigures+ and \verb+\listoftables+ perform a
similar function with the figures and tables defined in your text.

\subsubsection{Creating a List of Abbreviations}
The List of Abbreviations is generated by the command
\verb+\listofabbreviations+ followed by the text of the list.
Formatting of the list itself is left up to the student, although an
example of how it can be done is found in the source file for this
document.
The title {\bf LIST OF ABBREVIATIONS} will be centered at the
top of the page.
Any pages after the first page will have a
{\bf LIST OF ABBREVIATIONS (Continued)} heading.
It will not appear in the Table of Contents.

\subsubsection{Creating a Summary}
A summary is required.
The proper format for it is created with the command \verb+\summary+
followed by the text of the summary.
The title {\bf SUMMARY} will be centered at the top of the page.
Subsequent pages will have the heading {\bf SUMMARY (continued)}.
It will not appear in the Table of Contents.

\section{Sectioning Commands in the Body of the Thesis}
\label{sec:section}
Technical documents, like this one, are often divided into sections.
Each section has a heading containing a title and a number for easy
reference.
\LaTeX{} and \uicthesi{} have a series of commands that will allow you
to identify different kinds of sections.
Once you have done this \uicthesi{} takes on the
responsibility of laying out the title and of providing the numbers.

The commands that you can use are shown in \ref{fig:sections}.
\begin{figure}
\centering
\verb+\chapter+\\
\verb+\section+\\
\verb+\subsection+\\
\verb+\subsubsection+\\
\verb+\paragraph+\\
\verb+\subparagraph+
\caption{Sectioning commands}\label{fig:sections}
\end{figure}
The naming of these last two kinds of sections are
unfortunate, since they do not really have anything to do with
`paragraphs' in the normal sense of the word; they are just
lower levels of section.
Paragraphs, in the normal sense, are created by leaving a blank line
in the text.
The commands should be used in the order given, since sections are
numbered within chapters, subsections within sections, etc.

In standard document styles,
a seventh sectioning command, \verb|\part|, is also available.
Its use is always optional, and it is used to divide a large document
into series of parts.
It does not alter the numbering used for any of the other commands.
\verb|\part| is not available in \uicthesi{}.

\section{Sectioning Commands in the Appendix}
\subsection{Starting the Appendices}
When the thesis has reached that point where the main body of
the text has ended and the appendix sections are to begin, the
command \verb+\appendix+ should be used.  All \verb+\chapter+ divisions
after this point will be produce sectioning formats, headings and Table
of Contents entries for appendices rather than for regular chapters.

\subsection{Multiple Appendices}
If the thesis contains more than one appendix, the command
\verb+\appendices+ will create a page which contains only the
word {\bf APPENDICES} and the page number.
This command should immediately
precede the \verb+\appendix+ command described above.

\section{Back Matter}
\subsection{Creating a Cited Literature Section}
The Cited Literature section is created automatically by the
\verb+\bibliography{bblfile}+ command.  The \verb+bblfile+
in that command identifies the name of the external bibliography file
created by \BibTeX{}, described below.

\subsection{Using \BibTeX}
\BibTeX\ is a program for compiling a reference list for a document
from a bibliographic database.  It is run by entering
\begin{verbatim}
     BIBTEX MYFILE
\end{verbatim}
where \mbox{\tt MYFILE TEX} is the name of your \LaTeX\ input file.
This reads the file \mbox{\tt MYFILE AUX}, which was generated when you
ran \LaTeX\ on \mbox{\tt MYFILE TEX}, and produces the file \mbox{\tt
MYFILE BBL}.
The \BibTeX\ program requires a separate source file, call a \verb+BIB+
file, containing the information that will appear in the Cited Literature
section.

Instead of the \verb+\bibliographystyle+ command used with standard
\LaTeX{} styles,
the particular bibliography style is selected by the command
\verb+\bibform+{\it n}, where {\it n} is either \verb+a+, \verb+b+
or \verb+c+.
These commands correspond to the three bibliography styles described
in the Graduate School thesis manual\cite{thesis_dir}.
\verb+\bibforma+ creates text citations containing the author's name
and the year of publication and creates an unnumbered, alphabetized
Cited Literature section.
\verb+\bibformb+ creates numbered text citations and creates a
numbered Cited Literature section ordered by the order of their first
appearance in the text.
\verb+\bibformc+ creates numbered text citations like \verb+\bibformb+,
but the Cited Literature section is numbered and ordered alphabetically.

There is a simple \BibTeX{} User's Guide available through INFORM
(enter {\tt INFORM BIBTEX} in CMS)

In the Cited Literature section near the end of this manual,
there are sample entries for an article\cite{smpl_article}, a
book\cite{smpl_book}, an article in a
collection\cite{smpl_incollection}, and
a thesis\cite{smpl_masterthesis}.

\subsection{Creating a Vita}
The vita is generated by the command \verb+\vita+
followed by the text of the vita.
It is up to the user to provide the formatting commands within the vita.
It will appear in the table of contents.

\chapter{Environments}
We mentioned earlier the idea of identifying a quotation to \LaTeX{} or
\uicthesi{} so that
it could arrange to typeset it correctly. To do this you enclose the
quotation between the commands \verb|\begin{quotation}| and
\verb|\end{quotation}|.
This is an example of a \LaTeX{} construction called an {\em environment\/}.
A number of
special effects are obtained by putting text into particular environments.

\section{Quotations}
There are two environments for quotations: {\tt quote}
and {\tt quotation}.
{\tt quote} is used either for a short quotation or for a sequence of
short quotations separated by blank lines.
An illustration of how to create a quote environment is shown in
\ref{fig:quote}.
\begin{figure}
\footnotesize
\begin{minipage}[t]{0.48\textwidth}
\begin{verbatim}
US presidents ... pithy remarks:
\begin{quote}
The buck stops here.

I am not a crook.
\end{quote}
\end{verbatim}
\end{minipage}\hfill
\begin{minipage}[t]{0.48\textwidth}
US presidents have been known for their pithy remarks:
\begin{quote}
The buck stops here.

I am not a crook.
\end{quote}
\end{minipage}
\vspace{1em}
\caption{Creating a quote}\label{fig:quote}
\end{figure}

Use the {\tt quotation} environment for quotations that consist of more
than one paragraph.  Paragraphs in the input are separated by blank
lines as usual.
An illustration of how to create a quotation environment is shown in
\ref{fig:quotation}.
\begin{figure}
\footnotesize
\begin{minipage}[t]{0.48\textwidth}
\begin{verbatim}
Here is some advice to remember:
\begin{quotation}
Environments for making
...other things as well.

Many problems
...environments.
\end{quotation}
\end{verbatim}
\end{minipage}\hfill
\begin{minipage}[t]{0.48\textwidth}
Here is some advice to remember:
\begin{quotation}
Environments for making quotations
can be used for other things as well.

Many problems can be solved by
novel applications of existing
environments.
\end{quotation}
\end{minipage}
\vspace{1em}
\caption{Creating a quotation}\label{fig:quotation}
\end{figure}

\section{Centering and Flushing}
Text can be centered on the page by putting it within the {\tt center}
environment.
It will appear flush against the left or right margins if it
is placed within the {\tt flushleft} or {\tt flushright} environments.

Text within these environments will be formatted in the normal way, in
particular the ends of the lines that you type are just regarded as
spaces.  To
indicate a ``newline'' you need to type the \verb|\\| command.
\ref{fig:center} is an illustration of how to center text.
\begin{figure}
\footnotesize
\begin{minipage}[t]{0.48\textwidth}
\begin{verbatim}
\begin{center}
one
two
three \\
four \\
five
\end{center}
\end{verbatim}
\end{minipage}\hfill
\begin{minipage}[t]{0.48\textwidth}
\begin{center}
one
two
three \\
four \\
five
\end{center}
\end{minipage}
\vspace{1em}
\caption{Centering text}\label{fig:center}
\end{figure}

\section{Lists}
There are three environments for constructing lists.  In each one each new
item is begun with an \verb|\item| command.  In the {\tt itemize} environment
the start of each item is given a marker, in the {\tt enumerate}
environment each item is marked by a number.  These environments can be nested
within each other in which case the amount of indentation used
is adjusted accordingly:
An illustration of how to create a an enumerated list within an itemized
list is shown in \ref{fig:list}.
\begin{figure}
\footnotesize
\begin{minipage}[t]{0.48\textwidth}
\begin{verbatim}
\begin{itemize}
\item Itemized lists are handy.
\item However, don't forget
  \begin{enumerate}
  \item The `item' command.
  \item The `end' command.
  \end{enumerate}
\end{itemize}
\end{verbatim}
\end{minipage}\hfill
\begin{minipage}[t]{0.48\textwidth}
\begin{itemize}
\item Itemized lists are handy.
\item However, don't forget
  \begin{enumerate}
  \item The `item' command.
  \item The `end' command.
  \end{enumerate}
\end{itemize}
\end{minipage}
\vspace{1em}
\caption{Creating an enumerated list within an itemized list}
\label{fig:list}
\end{figure}

The third list making environment is {\tt description}.
In a description you specify the item labels inside square brackets
after the \verb|\item| command.
For an illustration of how to create a description list,
see \ref{fig:description}.
\begin{figure}
\footnotesize
\begin{minipage}[t]{0.48\textwidth}
\begin{verbatim}
Three animals that you should
know about are:
\begin{description}
  \item[gnat] A small animal...
  \item[gnu] A large animal...
  \item[armadillo] A ...
\end{description}
\end{verbatim}
\end{minipage}\hfill
\begin{minipage}[t]{0.48\textwidth}
Three animals that you should
know about are:
\begin{description}
  \item[gnat] A small animal that causes no end of trouble.
  \item[gnu] A large animal that causes no end of trouble.
  \item[armadillo] A medium-sized animal.
\end{description}
\end{minipage}
\vspace{1em}
\caption{Creating a description list}
\label{fig:description}
\end{figure}

\section{Figures}
Many dissertations will require illustrative materials in the form of
figures.
The \verb+figure+ environment is used to create a figure.
You may create the content of the figure within \uicthesi{} itself
or leave empty space so that illustrative material from other sources
may be copied in the blank space.
An example of a figure environment is shown in \ref{fig:fig}.
In that example, you will notice a command
\verb+\label{example}+ following the caption.
This command allows a writer to refer to the figure by name instead of
by number in the text of the thesis at a moment when the writer may not
know what the number will be.
In this example, the writer may refer to the figure as
\verb+\ref{example}+ and it will appear in the text as ``Figure 1'',
or whatever number the figure eventually becomes.
The figure environment also generates information that will automatically
produce a List of Figures.
To specify where the List of Figures is to appear, use the command
\verb+\listoffigures+.
\begin{figure}
\footnotesize
\begin{minipage}[t]{0.48\textwidth}
\begin{verbatim}
\begin{figure}
\vspace{3em}
\begin{center}
Place figure material here.
\end{center}
\vspace{3em}
\caption{This is an example.}
\label{example}
\end{figure}
\end{verbatim}
\end{minipage}\hfill
\begin{minipage}[t]{0.48\textwidth}
\vspace{3em}
\begin{center}
Place figure material here.
\end{center}
\vspace{3em}
\begin{center}
Figure 1. This is an example.
\end{center}
\end{minipage}
\vspace{1em}
\caption{How to create a figure.}
\label{fig:fig}
\end{figure}

\section{Tables}
Many dissertations will require the display of tabular information.
The \verb+table+ environment is used to create a table.
You may, like the figure, create the content of the figure within
\uicthesi{} itself, or leave empty space so that the tabular content from
other sources may be copied in the blank space.
An example of a table environment is shown in \ref{fig:tab}.
Like figures, a table may take a \verb+\label+ command for symbolic
reference.
It works the same way, except that instead of ``Figure 1'', the
\verb+\ref{example}+ will appear as ``Table I''.
As with the figure environment, the table environment also generates
information that will automatically produce a List of Tables.
To specify where the List of Tables is to appear, use the command
\verb+\listoftables+.
\begin{figure}
\footnotesize
\begin{minipage}[t]{0.48\textwidth}
\begin{verbatim}
\begin{table}
\caption{Example Table}
\label{example}
\tablerule
\vspace{3em}
\begin{center}
Place tabular material here.
\end{center}
\vspace{3em}
\tablerule
\end{table}
\end{verbatim}
\end{minipage}\hfill
\begin{minipage}[t]{0.48\textwidth}
\begin{center}
TABLE I\\EXAMPLE TABLE
\end{center}
\tablerule
\vspace{3em}
\begin{center}
Place tabular material here.
\end{center}
\vspace{3em}
\tablerule
\end{minipage}
\vspace{1em}
\caption{How to create a table.}
\label{fig:tab}
\end{figure}

\section{Tabular Alignment with the Tabbing Environment}
One of the hardest parts of typesetting is the creation of aligned
material.
The \verb+table+ environment described above does nothing to
provide such alignments; it only sets off a section of material
that will be labeled as a table and entered into the list of tables.
The alignment of the material itself must be accomplished by other
means.
This section and the next will present two approaches, two environments
that may be used within a \verb+table+ environment to align information.

Because \LaTeX{} will almost always convert a sequence of spaces
into a single space,
it can be rather difficult to lay out tables.
See what happens in the example in \ref{fig:badtab}.
\nolinebreak
\begin{figure}
\footnotesize
\begin{minipage}[t]{0.48\textwidth}
\begin{verbatim}
\begin{flushleft}
Income  Expenditure Result   \\
20s 0d  19s 11d     happiness \\
20s 0d  20s 1d      misery  \\
\end{flushleft}
\end{verbatim}
\end{minipage}\hfill
\begin{minipage}[t]{0.48\textwidth}
\begin{flushleft}
Income  Expenditure Result   \\
20s 0d  19s 11d     happiness \\
20s 0d  20s 1d      misery  \\
\end{flushleft}
\end{minipage}
\vspace{1em}
\caption{Tabular alignment: the wrong way}
\label{fig:badtab}
\end{figure}

The {\tt tabbing} environment overcomes this problem. Within it you set
tabstops and tab to them much like you do on a typewriter.  Tabstops are
set with the \verb|\=| command, and the \verb|\>| command moves to the
next stop.
The \verb|\\| command is used to separate each line.
A line that ends \verb|\kill|
produces no output, and can be used to set tabstops:
Now see what happens in the example in \ref{fig:tabbing}
\nolinebreak
\begin{figure}
\footnotesize
\begin{minipage}[t]{0.48\textwidth}
\begin{verbatim}
\begin{tabbing}
Income \=Expenditure \=    \kill
Income \>Expenditure \>Result \\
20s 0d \>19s 11d \>Happiness   \\
20s 0d \>20s 1d  \>Misery    \\
\end{tabbing}
\end{verbatim}
\end{minipage}\hfill
\begin{minipage}[t]{0.48\textwidth}
\begin{tabbing}
Income \=Expenditure \=    \kill
Income \>Expenditure \>Result \\
20s 0d \>19s 11d \>Happiness   \\
20s 0d \>20s 1d  \>Misery    \\
\end{tabbing}
\end{minipage}
\vspace{1em}
\caption{Tabular alignment with tabbing}
\label{fig:tabbing}
\end{figure}

Unlike a typewriter's tab key, the \verb|\>| command always moves to
the next tabstop in sequence, even if this means moving to the left.
This can cause text to be overwritten if the gap between two tabstops
is too small.

\section{Tabular Alignment with the Tabular Environment}
Tabular alignments may also be created with the \verb+tabular+
environment.
See \ref{fig:tabular} for an example.
In that example, the argument in curly brackets following the
\verb+\begin{tabular}+ indicates how many columns, how the items are to
be placed in each of those columns, and whether there are vertical
separators. In this example, \verb+{|r|c|r|}+ indicates that there
is to be three columns, the first and third column are to be right
justified and the second column is to be centered.  Each of the columns
are to be separated by vertical lines, as indicated by the \verb+|+.
The \verb+\hline+ indicates the presence of horizontal lines.
Within the body of the table, \verb+&+ is used to separate the fields
from each other, and \verb+\\+ indicates the end of a line.
The \verb+\multicolumn+ command is used to create entries which span
across several fields, with its own formatting instructions.
As you can see from the example, footnotes may be created within
tables, but not with the ordinary \verb+\footnote+ command.
The \verb+\footnote+ command is used to create numbered footnotes in
the text that appear at the bottom of the page, but a manual process,
such as shown in the example, is required to create a lower-case lettered
footnote in a table that then appears at the bottom of the table.

\begin{figure}
\footnotesize
\begin{minipage}[t]{0.48\textwidth}
\begin{verbatim}
\begin{tabular}{|r|c|r|}
\hline
\multicolumn{3}{|c|}{AT\&T Common Stock}
   \\ \hline
Year&Price&Dividend\\ \hline
1971&41--54&\$2.60\\ \hline
2&41--54&2.70\\ \hline
3&46--55&2.87\\ \hline
4&40--53&3.24\\ \hline
5&45--52&3.40\\ \hline
6&51--59&.95\rlap{$^{a}$}\\ \hline
\multicolumn{3}{l}
 {$^{a}$\small (first quarter only)}
\end{tabular}
\end{verbatim}
\end{minipage}\hfill
\begin{minipage}[t]{0.48\textwidth}
\begin{tabular}{|r|c|r|}
\hline
\multicolumn{3}{|c|}{AT\&T Common Stock}
   \\ \hline
Year&Price&Dividend\\ \hline
1971&41--54&\$2.60\\ \hline
2&41--54&2.70\\ \hline
3&46--55&2.87\\ \hline
4&40--53&3.24\\ \hline
5&45--52&3.40\\ \hline
6&51--59&.95\rlap{$^{a}$}\\ \hline
\multicolumn{3}{l}
   {$^{a}$\scriptsize (first quarter only)}
\end{tabular}
\end{minipage}
\vspace{1em}
\caption{Tabular alignment with tabular}
\label{fig:tabular}
\end{figure}

\section{Verbatim Output}
Sometimes you will want to include text exactly as it appears on a
terminal screen.
For example, you might want to include part of a computer program.
Not only do you want \LaTeX{} to stop playing around with the layout
of your text, you also want to be able to type all the characters
on your keyboard without confusing \LaTeX.
The {\tt verbatim} environment has this effect,
as shown in \ref{fig:verbatim}.
\begin{figure}
\footnotesize
\begin{minipage}[t]{0.48\textwidth}
\begin{flushleft}
\verb|The section of program in|  \\
\verb|question is:|               \\
\verb|\begin{verbatim}|           \\
\verb|{ this finds %a & %b }|     \\[2ex]

\verb|for i := 1 to 27 do|        \\
\ \ \ \verb|begin|                \\
\ \ \ \verb|table[i] := fn(i);|   \\
\ \ \ \verb|process(i)|           \\
\ \ \ \verb|end;|                 \\
\verb|\end{verbatim}|
\end{flushleft}
\end{minipage}\hfill
\begin{minipage}[t]{0.48\textwidth}
The section of program in
question is:
\begin{verbatim}
{ this finds %a & %b }

for i := 1 to 27 do
   begin
   table[i] := fn(i);
   process(i)
   end;

\end{verbatim}
\end{minipage}
\vspace{1em}
\caption{Creating a verbatim environment}
\label{fig:verbatim}
\end{figure}

\section{Mathematical Expressions}
The great appeal of the \LaTeX{} typesetting is its ability to
typeset mathematical expressions of almost any complexity with
ease.  This document will not go into the details of how such
typesetting is to be done --- it would take a much longer work
than this.  However, it should be noted here that there are
three basic kinds of mathematical typesetting.
First, there is the in-text mode, produced by the \verb+math+
environment.  This produces a math expression right within a
sentence.  It can be produced by
\verb+\begin{math}+\ldots\verb+\end{math}+, or more frequently,
by one of two short forms, \verb+\(+\ldots\verb+\)+ or
\verb+$+\ldots\verb+$+.
The \verb+displaymath+ environment produces unnumbered displayed
formulas, that is, formulas that are set off by themselves,
centered on a line by themselves.  It can be produced by
\verb+\begin{displaymath}+\ldots\verb+\end{displaymath}+ or by the
short form \verb+\[+\ldots\verb+\]+.
A third variation is the \verb+equation+ environment, produced
by \verb+\begin{equation}+\ldots\verb+\end{equation}+ (there
is no short form for this environment), which are like the
displayed equations above, but are numbered.  Such equations
may be symbolically identified by the \verb+\label+ command
and refered to in the text with the \verb+\ref+ command.
By default, the equations are chapter-relative numbered, i.e.
the designation $m.n$ indicates that this is the $n$th equation
in Chapter $m$.  As an option, the user may include the
command \verb+\abseqnumberingtrue+ in the preamble to produce
absolute numbered equations, in which no chapter designation
occurs and the equation numbers increase through the entire document.

\chapter{Errors}
When you create a new input file for \LaTeX{} you will probably make
mistakes.
Everybody does, and it's nothing to be worried about.
As with most computer programs, there are two sorts of mistake that
you can make: those that \LaTeX{} notices and those that it doesn't.
To take a rather silly example, since \LaTeX{} doesn't understand
what you are saying it isn't going to be worried if
you misspell some of the words in your text.
You will just have to accurately proofread your printed output.
On the other hand, if you misspell one of the environment names in
your file then \LaTeX{} won't know what you want it to do.

When this sort of thing happens, \LaTeX{} prints an error message on your
terminal screen and then stops and waits for you to take some action.
Unfortunately, the error messages that it produces are rather
user-unfriendly.
Nevertheless, if you know where to look they
will probably tell you where the error is and what went wrong.

For example,
consider what would happen if you mistyped \verb+\begin{itemize}+ so
that it became \verb+\begin{itemie}+.
When \LaTeX{} processes this instruction, it
displays the text shown in \ref{fig:error}.
\begin{figure}
\begin{quote}\footnotesize\begin{verbatim}
LaTeX error.  See LaTeX manual for explanation.
              Type  H <return>  for immediate help.
! Environment itemie undefined.
\@latexerr ...for immediate help.}\errmessage {#1}
                                                  \endgroup
l.140 \begin{itemie}

?
\end{verbatim}\end{quote}
\vspace{1em}
\caption{Latex error report}
\label{fig:error}
\end{figure}
After typing the `?' \LaTeX{} stops and waits for you to tell it
what to do.

The first two lines of the message just tell you that the error was
detected by \LaTeX{}.
The third line, the one that starts `!' is the {\em error indicator}.
It tells you what the problem is, though until you have had some
experience of \LaTeX{} this may not mean a lot to you.
In this case it is just telling you
that it doesn't recognize an environment called {\tt itemie}.
The next two lines tell you what \LaTeX{} was doing when it found the
error, they are irrelevant at the moment and can be ignored.
The final line is called the {\em error locator}, and is
a copy of the line from your file that caused the problem.
It starts with a line number to help you to find it in your file, and
if the error was in the middle of a line it will be shown
broken at the point where \LaTeX{} realized that there was an error.
\LaTeX{} can sometimes pass the point where the real error is before
discovering that something is wrong, but it usually doesn't get very far.

At this point you could do several things.
If you knew enough about \LaTeX{} you might be able to fix the problem,
or you could type `X' and press the return key to stop \LaTeX{} running
while you go and correct the error.
The best thing to do, however, is just to press the return key.
This will allow \LaTeX{} to go on running as if nothing had happened.
If you have made one mistake, then you have probably made several
and you may as well try to find them all in one go.
It's much more efficient to do it this way than to run
\LaTeX{} over and over again fixing one error at a time.
Don't worry about remembering what the errors were---a copy of all
the error messages is being
saved in a {\em log\/} file so that you can look at them afterwards.
On CMS, the log file has the same name as the file to be processed, but
the file type is {\tt TEXLOG}.

If you look at the line that caused the error it's usually obvious
what the problem was.
If you can't work out what your problem is look at the hints
below, and if they don't help consult Chapter~6 of the manual.
It contains a list of all of the error messages that you are likely
to encounter together with some hints as to what may have caused them.

Some of the most common mistakes that cause errors are:
\begin{enumerate}
\item A misspelt command or environment name.
\item Improperly matched `\verb+{+' and `\verb+}+ ---remember
that they should always come in pairs.
\item Trying to use one of the ten special
characters \verb|# $ % & _ { } ~ ^| and \verb|\| as an ordinary
printing symbol.
\item A missing \verb|\end| command.
\item A missing command argument (that's the bit enclosed
in '\verb+{+' and `\verb+}+').
\end{enumerate}

One error can get \LaTeX{} so confused that it reports a series of
spurious errors as a result.
If you have an error that you understand, followed by a series that you
don't, try correcting the first error---the rest may vanish as if
by magic.

Sometimes \LaTeX{} may write a {\tt *} and stop without an error message.
This is normally caused by a missing \verb+\end{document}+ command,
but other errors can cause it.
If this happens type \verb+\stop+ and press the return key.

Finally, \LaTeX{} will sometimes print {\em warning\/} messages.
They report problems that were not bad enough to cause \LaTeX{} to
stop processing, but nevertheless may require investigation.
The most common problems are `overfull' and `underfull' lines of text.
A message like:
\begin{quote}\footnotesize\begin{verbatim}
Overfull \hbox (10.58649pt too wide) in paragraph at lines 172--175
[]\tenrm Mathematical for-mu-las may be dis-played. A dis-played
\end{verbatim}\end{quote}
indicates that \LaTeX{} could not find a good place to break a line
when laying out a paragraph.
As a result, it was forced to let the line stick out into the
right-hand margin, in this case by 10.6 points.
Since a point is about 1/72nd of an inch this may be rather hard to see,
but it will be there none the less.

This particular problem happens because \LaTeX{} is rather fussy about
line breaking, and it would rather generate a line that is too long
than generate a paragraph that doesn't meet its high standards.
The simplest way around the
problem is to enclose the entire offending paragraph between
\verb|\begin{sloppypar}| and \verb|\end{sloppypar}| commands.
This tells \LaTeX{} that you are happy for it to break its own rules
while it is working on that particular bit of text.

Alternatively, messages about ``Underfull \verb|\hbox'es''| may appear.
These are lines that had to have more space inserted between
words than \LaTeX{} would have liked.
In general there is not much that you can do about these.
Your output will look fine, even if the line looks a bit stretched.
About the only thing you could do is re-write the offending paragraph!

\chapter{Bugs}

There are a few known bugs in \LaTeX\ that occur very seldom and
cause the user little trouble, but would be very difficult to fix.
Moreover, given the nature of complex systems, it is likely that
the corrections would lead to even worse problems.  Therefore, these
bugs will probably not be fixed.

The bugs and ways to get around them are listed below.  Do not worry
about any of them until you are preparing the final draft, since
changes to the text are very likely to cause the problem to disappear.
\begin{enumerate}
\item In rare instances, a figure or table will be printed on the page
preceding the text where the {\tt figure} or {\tt table} environment
appears.  This can be fixed by moving the environment further
towards the end of the document.

\item A footnote can be broken across two pages when it should fit on a
single page.  This happens when there is one or more figures or tables
on the page.  The problem is corrected by moving, towards the end of the
file, the last {\tt figure} or {\tt table} environment that produces a
figure or table on the page where the footnote starts.

\item If you prepare your \verb+TEX+ file from a PC connected
to UICVM with Telnet, incorrect codes will be generated for
\verb+{+ and \verb+}+.
To correct all instances of incorrectly encoded braces, give the
command \verb+CURLYFIX+ from the Xedit command line.
This will not alter the future encoding of these symbols, only correct
the existing braces.
You must be connected to the \verb+TEXTOOLS+ disk before the
\verb+CURLYFIX+ command can be used.
Make sure to use the command \verb+GETDISK TEXTOOLS+ before you use
\verb+CURLYFIX+.
\end{enumerate}

\chapter{A Final Reminder}

You now know enough \LaTeX{} to produce a wide range of documents.
But this document has only scratched the surface of the
things that \LaTeX{} can do. In particular, now that \LaTeX $2_\epsilon$
has been released it would be a very good idea buy or borrow an up to
date reference manual.

This entire document was itself produced with
\LaTeX{} $2_\epsilon$ and \uicthesi{}
(with no sticking things in or clever use of a photocopier) and even
it hasn't used all the features that it could.
From this you may get some
feeling for the power that \LaTeX{} puts at your disposal.

Please remember what was said in the introduction: if you {\bf do} have a
complex document to produce then
{\bf go and read the manual}\cite{latex_guide}
You will be wasting your time if you rely only on what you
have read here.

One other warning: having
dabbled with \LaTeX{} your documents will never be the same again \ldots.

\appendices
\appendix
\newpage
\input fontsym
\bibformb
\bibliography{uictman}
\vita
This is where the vita goes.  Its organization is left as an exercise.
Hint: see the list of abbreviations.
\end{document}
Preview

PDF Preview
Create an account to compile and preview