ArticalTemplate.texRead-only preview
% Written by Bibby AI
% 设定文章编码类型,正文字号为五号则 zihao=5,正文字号为小四则 zihao=-4
\documentclass[zihao=5, UTF8]{article}


% 自定义宏定义
\def\N{\mathbb{N}}
\def\F{\mathbb{F}}
\def\Z{\mathbb{Z}}
\def\Q{\mathbb{Q}}
\def\R{\mathbb{R}}
\def\C{\mathbb{C}}
\def\T{\mathbb{T}}
\def\S{\mathbb{S}}
\def\A{\mathbb{A}}
\def\I{\mathscr{I}}
\def\d{\mathrm{d}}
\def\p{\partial}


% 物理实验报告所需的其它宏包
\usepackage{ulem}   % \uline 下划线支持

% 导入基本宏包
\usepackage[UTF8]{ctex}     % 设置文档为中文语言
    \usepackage{hyperref}  % 宏包:自动生成超链接 (此宏包与标题中的数学环境冲突)
    \hypersetup{
        colorlinks=true,    % false:边框链接 ; true:彩色链接
        citecolor={blue},    % 文献引用颜色
        linkcolor={blue},   % 目录 (我们在目录处单独设置),公式,图表,脚注等内部链接颜色
        urlcolor={magenta},    % 网页 URL 链接颜色,包括 \href 中的 text
        % cyan 浅蓝色
        % magenta 洋红色
        % yellow 黄色
        % black 黑色
        % white 白色
        % red 红色
        % green 绿色
        % blue 蓝色
        % gray 灰色
        % darkgray 深灰色
        % lightgray 浅灰色
        % brown 棕色
        % lime 石灰色
        % olive 橄榄色
        % orange 橙色
        % pink 粉红色
        % purple 紫色
        % teal 蓝绿色
        % violet 紫罗兰色
    }
% \usepackage{docmute}    % 宏包:子文件导入时自动去除导言区,用于主/子文件的写作方式,\include{./51单片机笔记}即可。注:启用此宏包会导致.tex文件capacity受限。
\usepackage{amsmath}    % 宏包:数学公式
\usepackage{mathrsfs}   % 宏包:提供更多数学符号
\usepackage{amssymb}    % 宏包:提供更多数学符号
\usepackage{pifont}     % 宏包:提供了特殊符号和字体
\usepackage{extarrows}  % 宏包:更多箭头符号

% 文章页面 margin 设置
\usepackage[a4paper]{geometry}  % 宏包:文章页面 margin 设置
    \geometry{top=0.75in}
    \geometry{bottom=0.75in}
    \geometry{left=0.75in}
    \geometry{right=0.75in}   % 设置上下左右页边距
    \geometry{marginparwidth=1.75cm}    % 设置边注距离(注释、标记等)

% 自定义数学环境
\usepackage{amsthm} % 宏包:数学环境配置
% theorem-line 环境自定义
    \newtheoremstyle{MyLineTheoremStyle}% <name>
        {11pt}% <space above>
        {11pt}% <space below>
        {}% <body font> 使用默认正文字体
        {}% <indent amount>
        {\bfseries}% <theorem head font> 设置标题项为加粗
        {:}% <punctuation after theorem head>
        {.5em}% <space after theorem head>
        {\textbf{#1}\thmnumber{#2}\ \ (\,\textbf{#3}\,)}% 设置标题内容顺序
    \theoremstyle{MyLineTheoremStyle} % 应用自定义的定理样式
    \newtheorem{LineTheorem}{Theorem.\,}
% theorem-block 环境自定义
    \newtheoremstyle{MyBlockTheoremStyle}% <name>
        {11pt}% <space above>
        {11pt}% <space below>
        {}% <body font> 使用默认正文字体
        {}% <indent amount>
        {\bfseries}% <theorem head font> 设置标题项为加粗
        {:\\ \indent}% <punctuation after theorem head>
        {.5em}% <space after theorem head>
        {\textbf{#1}\thmnumber{#2}\ \ (\,\textbf{#3}\,)}% 设置标题内容顺序
    \theoremstyle{MyBlockTheoremStyle} % 应用自定义的定理样式
    \newtheorem{BlockTheorem}[LineTheorem]{Theorem.\,} % 使用 LineTheorem 的计数器
% definition 环境自定义
    \newtheoremstyle{MySubsubsectionStyle}% <name>
        {11pt}% <space above>
        {11pt}% <space below>
        {}% <body font> 使用默认正文字体
        {}% <indent amount>
        {\bfseries}% <theorem head font> 设置标题项为加粗
        {:\\ \indent}% <punctuation after theorem head>
        {0pt}% <space after theorem head>
        {\textbf{#3}}% 设置标题内容顺序
    \theoremstyle{MySubsubsectionStyle} % 应用自定义的定理样式
    \newtheorem{definition}{}


% 有色文本框及其设置
\usepackage[dvipsnames,svgnames]{xcolor}    %设置插入的文本框颜色
\usepackage[strict]{changepage}     % 提供一个 adjustwidth 环境
\usepackage{framed}     % 实现方框效果
    \definecolor{graybox_color}{rgb}{0.95,0.95,0.96} % 文本框颜色。修改此行中的 rgb 数值即可改变方框纹颜色,具体颜色的rgb数值可以在网站https://colordrop.io/ 中获得。(截止目前的尝试还没有成功过,感觉单位不一样)(找到喜欢的颜色,点击下方的小眼睛,找到rgb值,复制修改即可)
    \newenvironment{graybox}{%
    \def\FrameCommand{%
    \hspace{1pt}%
    {\color{gray}\small \vrule width 2pt}%
    {\color{graybox_color}\vrule width 4pt}%
    \colorbox{graybox_color}%
    }%
    \MakeFramed{\advance\hsize-\width\FrameRestore}%
    \noindent\hspace{-4.55pt}% disable indenting first paragraph
    \begin{adjustwidth}{}{7pt}%
    \vspace{2pt}\vspace{2pt}%
    }
    {%
    \vspace{2pt}\end{adjustwidth}\endMakeFramed%
    }

% 各级标题自定义设置
\usepackage{titlesec}
    % section标题自定义设置
    \titleformat{\section}[hang]{\normalfont\huge\bfseries\centering}{\,\thesection\,}{20pt}{}
    % subsection标题自定义设置
    \titleformat{\subsection}[hang]{\normalfont\Large\bfseries}{\,\thesubsection\,}{8pt}{}
    % subsubsection标题自定义设置
    \titleformat{\subsubsection}[hang]{\normalfont\large\bfseries}{\,\thesubsubsection\,}{6pt}{}

% 外源代码插入设置
\usepackage{matlab-prettifier}
    \lstset{
        style=Matlab-editor,  % 继承matlab代码颜色等
    }
\usepackage[most]{tcolorbox} % 引入tcolorbox包
\usepackage{listings} % 引入listings包
    \tcbuselibrary{listings, skins, breakable}
    \lstdefinestyle{matlabstyle}{
        language=Matlab,
        basicstyle=\small,
        breakatwhitespace=false,
        breaklines=true,
        captionpos=b,
        keepspaces=true,
        numbers=left,
        numbersep=15pt,
        showspaces=false,
        showstringspaces=false,
        showtabs=false,
        tabsize=2
    }
    \newtcblisting{matlablisting}{
        arc=0pt,
        top=0pt,
        bottom=0pt,
        left=1mm,
        listing only,
        listing style=matlabstyle,
        breakable,
        colback=white   % 选一个合适的颜色
    }

% table 支持
\usepackage{booktabs}   % 宏包:三线表
\usepackage{tabularray} % 宏包:表格排版
\usepackage{longtable}  % 宏包:长表格

% figure 设置
\usepackage{graphicx}  % 支持 jpg, png, eps, pdf 图片
\usepackage{svg}       % 支持 svg 图片
    \svgsetup{
        % 指向 inkscape.exe 的路径
        inkscapeexe = C:/aa_MySame/inkscape/bin/inkscape.exe,
        % 一定程度上修复导入后图片文字溢出几何图形的问题
        inkscapelatex = false
    }

% 圆圈序号自定义
\newcommand*\circled[1]{\tikz[baseline=(char.base)]{\node[shape=circle,draw,inner sep=0.8pt, line width = 0.03em] (char) {\small \bfseries #1};}}   % TikZ solution


% 列表环境设置
\usepackage{enumitem}   % 宏包:列表环境设置
    \setlist[enumerate]{itemsep=0pt, parsep=0pt, topsep=0pt, partopsep=0pt, leftmargin=3.5em}
    \setlist[itemize]{itemsep=0pt, parsep=0pt, topsep=0pt, partopsep=0pt, leftmargin=3.5em}
    \newlist{circledenum}{enumerate}{1} % 创建一个新的枚举环境
    \setlist[circledenum,1]{
        label=\protect\circled{\arabic*}, % 使用 \arabic* 来获取当前枚举计数器的值,并用 \circled 包装它
        ref=\arabic*, % 如果需要引用列表项,这将决定引用格式(这里仍然使用数字)
        itemsep=0pt, parsep=0pt, topsep=0pt, partopsep=0pt, leftmargin=3.5em
    }

% 图表进阶设置
    \usepackage{float}     % 图表位置浮动设置
    \usepackage{caption}    % 图注、表注
        \captionsetup[figure]{name=图}
        \captionsetup[table]{name=表}
        \captionsetup{
                labelfont=bf, % 设置标签为粗体
                textfont=bf,  % 设置文本为粗体
                font=small
            }
    \usepackage{etoolbox} % 用于保证图注表注的数学字符为粗体
        \AtBeginEnvironment{figure}{\boldmath} % 图注中的数学字符为粗体
        \AtBeginEnvironment{table}{\boldmath}  % 表注中的数学字符为粗体
        \AtBeginEnvironment{tabular}{\unboldmath}   % 保证表格中的数学字符不受额外影响
% 文章默认字体设置
    \usepackage{fontspec}   % 宏包:字体设置
        \setmainfont{SimSun}    % 设置中文字体为宋体字体
        \setCJKmainfont[AutoFakeBold=3]{SimSun} % 设置加粗字体为 SimSun 族,AutoFakeBold 可以调整字体粗细
        \setmainfont{Times New Roman} % 设置英文字体为Times New Roman


% 其它设置
    % equation 公式编号设置
        \makeatletter
        \renewcommand{\theequation}{\thesection.\arabic{equation}}
        \makeatother
    % 脚注设置
        \renewcommand\thefootnote{\ding{\numexpr171+\value{footnote}}}
    % 参考文献引用设置
        \bibliographystyle{unsrt}   % 设置参考文献引用格式为unsrt
        \newcommand{\upcite}[1]{\textsuperscript{\cite{#1}}}     % 自定义上角标式引用
    % 文章序言设置
        \newcommand{\cnabstractname}{序言}
        \newenvironment{cnabstract}{%
            \par\Large
            \noindent\mbox{}\hfill{\bfseries \cnabstractname}\hfill\mbox{}\par
            \vskip 2.5ex
            }{\par\vskip 2.5ex}

% --------------------- 文章信息区 --------------------- %
% --------------------- 文章信息区 --------------------- %
% 页眉页脚设置
\usepackage{fancyhdr}   %宏包:页眉页脚设置
    \pagestyle{fancy}
    \fancyhf{}
    \cfoot{\thepage}
    \renewcommand\headrulewidth{1pt}
    \renewcommand\footrulewidth{0pt}
    \rhead{\bfseries 分组序号:3-07}
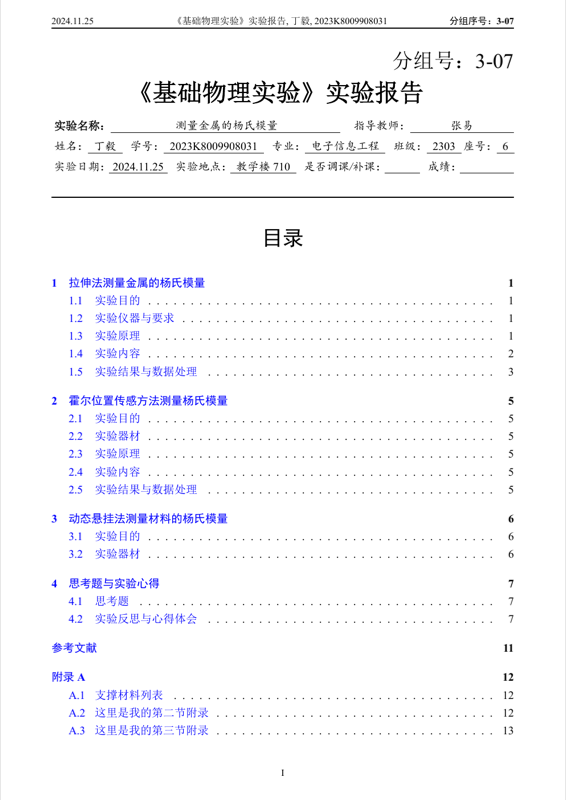
    \chead{《基础物理实验》实验报告,\ 丁毅,\ 2023K8009908031}
    \lhead{2024.11.25}

% 文档信息设置
%\title{这里是标题\\The Title of the Report}
%\author{丁毅\\ \footnotesize 中国科学院大学,北京 100049\\ Yi Ding \\ %\footnotesize University of Chinese Academy of Sciences, Beijing %100049, China}
%\date{\footnotesize 2024.8 -- 2025.1}
% --------------------- 文章信息区 --------------------- %
% --------------------- 文章信息区 --------------------- %

% 开始编辑文章

\begin{document}

\begin{flushright}
    \zihao{2}{分组号:3-07}
\end{flushright}

\setCJKfamilyfont{boldsong}[AutoFakeBold = {2.17}]{SimSun}
\newcommand*{\boldsong}{\CJKfamily{boldsong}}

\begin{center}\large
    \noindent{\Huge\bfseries\boldsong《基础物理实验》实验报告 }
    \\\vspace{0.4cm}
    \noindent\textit{
        \textbf{\boldsong 实验名称:}\uline{\hspace{2.3cm} 测量金属的杨氏模量\hspace{2.3cm}}\hspace{0.4cm}
        指导教师:\uline{\hspace{1.5cm}张易\hspace{1.5cm}}}
    \\\vspace{0.1cm}
    \noindent\textit{
        姓名:\uline{\,\,\,丁毅\,\,\,}\hspace{0.2cm}
        学号:\uline{\,\,\,{\upshape 2023K8009908031}\,\,\,}\hspace{0.2cm}
        专业:\uline{\,\,\,电子信息工程\,\,\,}\hspace{0.2cm}
        班级:\uline{\,\,\,\upshape{2303}\,\,\,}\,座号:\uline{\,\,\,\upshape{6}\,\,\,}}
    \\\vspace{0.1cm}
    \noindent\textit{
        实验日期:\uline{\,\,{\upshape 2024.11.25}\,\,}\hspace{0.2cm}
        实验地点:\uline{\,\,\,教学楼{\upshape710}\,\,\,}\hspace{0.2cm}
        是否调课/补课:\uline{\hspace{1.3cm}}\hspace{0.2cm}
        成绩:\uline{\hspace{2cm}}}
\end{center}
% \vspace{-0.2cm}
\noindent\rule{\textwidth}{0.1em}\zihao{-4}   % 分割线

\pagenumbering{Roman} % 页码为大写罗马数字
\setcounter{tocdepth}{2}  % 设置目录的深度为2,即只显示section和subsection
\tableofcontents    % 目录页
\thispagestyle{fancy}   % 显示页码、页眉等
\newpage
\pagenumbering{arabic}

\section{拉伸法测量金属的杨氏模量}\thispagestyle{fancy}

\subsection{实验目的}


\begin{enumerate}
    \item 学会用CCD\footnote{Charge Coupled Device,电荷耦合器件}杨氏模量测量仪测量长度的微小变化量
    \item 学会测定金属丝杨氏弹性模量的一种方法
    \item 学习用逐差法、作图法和最小二乘法处理数据
    \item 学会不确定的计算方法,结果的正确表达
\end{enumerate}

\subsection{实验仪器与要求}
实验仪器 CCD杨氏弹性模量测量仪、螺旋测微器、钢卷尺。

CCD杨氏弹性模量测量仪的主要技术指标有:


\begin{enumerate}[leftmargin=2cm]
    \item 采用分划板 + CCD测量显微镜系统 + 彩色液晶监视器方案
    \item 立柱:不锈钢双柱高约 85 cm
    \item 钼丝:长约 60 cm,直径 0.18 mm,悬挂位置及长度可调节
    \item 监视器:彩色液晶监视器
    \item 分化板:刻度范围4mm,分度值0.05mm,设有限位槽,可防止来回摆动,采用 LED 照明
    \item CCD 测量显微镜系统:放大倍率60 倍,内含电子刻度线,可二维调节,可卸下用于其他微位移测量场合,采用高级面阵CCD,信噪比$ \geqslant 52\,\mathrm{db} $,分辨率$ 480\,\mathrm{TVL} $,视频输出幅度:$ 1.0\,\mathrm{V_{P-P}}/75\,\Omega $
    \item  砝码组:10 个砝码,2 个 100 g 及 8 个 200 g
    \item 底座沉稳,可进行水平调节,设有储藏格可贮存砝码组
    \item 测量相对不确定度:$< 5\ \%$
\end{enumerate}


\subsection{实验原理}
物体在外力作用下都会发生形变。当形变不超过某一限度时,撤走外力之后,形变消失,
物体形状恢复原状态,这样的形变称为弹性形变。弹性形变发生时,物体内部会产生恢复原
状的内应力。弹簧模量即为反映材料形变与内应力关系的物理量。

\subsubsection{杨氏模量}

记柱状物体的长度为$ L $,截面积为$ S $,沿长度方向受外力$ F $作用后伸长(或缩短)$ \Delta L $,单位横截面积上垂直作用力$ \frac FS $称为正应力,物体的相对伸长$ \frac{\Delta L}{L} $称为线应变。在弹性范围内,正应力与线应变成正比,即
\begin{equation}
    \frac FS=Y\frac{\Delta L}{L}
\end{equation}
该规律称为虎克定律。式中比例系数$ Y $即为杨氏弹性模量,其单位为$ \mathrm{N/m^2} $,其完全由材料的性质决定,与材料的几何形状无关。

本实验中测量钼丝的杨氏弹性模量,实验方法为将钼丝悬挂在支架上,上端固定,下端通过加砝码对钼丝施加力$ F $(由砝码的质量求出),测出钼丝相应的伸长量$ \Delta L $,用钢卷尺测出钼丝长度$ L $,用螺旋测微器测处钼丝直径$ d $,则可求得钼丝横截面积$ S=\frac{\pi d^2}{4} $。那么根据虎克定律可知

\begin{equation}
    Y=\frac{4FL}{\pi d^2\Delta L}
\end{equation}

\subsubsection{测量原理}

实际测量过程中,钼丝的伸长量很小,约为$ 10^{-1}\,\mathrm{mm} $数量级。所以本次实验中$ \Delta L $的测量采用显微镜和CCD成像系统进行测量。钼丝下端加上一定质量的砝码时,十字叉丝随着金属丝的伸长同样下降$ \Delta L $,而叉丝板通过显微镜的物镜成像在最小分度为$ 0.05\,\mathrm{mm} $的分划板上,CCD摄像机的镜头将显微镜的光学图象汇聚到CCD上,再变成视频电信号,经视频电缆传送到显示器上,供实验者读取。

\subsection{实验内容}

\subsubsection{注意事项}

\begin{enumerate}
    \item 使用CCD摄像机时,不能将CCD器件正对太阳、激光或其他强光源,注意保护镜头,如非特别需要不要随意卸下。
    \item 钼丝必须保持直线形态。测量直径时需要特别谨慎,避免扭转、拉扯、牵挂钼丝导致其折弯变形。
    \item 读数时需等到刻度值稳定后才能进行读数。
    \item 将砝码放置于砝码盘的时候需保证轻拿轻放,防止钼丝突然受力而断裂。
\end{enumerate}

\subsubsection{调节仪器}
用螺旋底角调平底座,使叉丝组分划板正对CCD摄像头。调节下横梁高度,保证叉丝组放置在下横梁的槽内。将CCD摄像头与分划板放置在同一水平面上,调节CCD摄像头位置,直到可以观察到清晰的像且分划板刻度尺的像在监视器的中心。

\subsubsection{测量数据}

\begin{enumerate}
    \item 在测量钼丝杨氏模量前,先放2块100\,g的砝码把钼丝拉直,保证分划板在下横梁槽内,避免在拉直过程中分划板的旋转。
    \item 记下待测细丝下的砝码盘中仅有已加的2块100\,g砝码时屏幕上显示的毫米尺在横线上的读数$ l_0 $,然后再砝码上依次加上8个$ M=200\,\mathrm{g} $的砝码,记下相应的叉丝读数$ l_i\;(i=1,2,\cdots,8) $。然后逐一减掉砝码,再读取$ l_8',l_7',\cdots,l_1' $。此过程中需注意轻拿轻放砝码,避免因增减砝码使得砝码盘产生微小振动而使得读数起伏较大。
    \item 取同一符合下叉丝读数的平均值$ \bar l_1,\bar l_2,\cdots,\bar l_8 $,用逐差法求出钼丝荷重增减四个砝码时光标的平均偏移量$ \Delta l $。
    \item 用钢卷尺测量上下夹头之间的钼丝长度$ L $。
    \item 用螺旋测微器测量钼丝直径$ d $,由于钼丝直径可能不均匀,需再上、中、下各部进行测量,每个位置在相互垂直的方向各测一次。
    \item 将前述原理公式整理可得
	\begin{equation}\label{1-Yang}
		Y=\frac{4MgL}{\pi d^2\Delta l}
	\end{equation}
	式中$ \Delta l $与$ M $有对应关系,本实验中$ \Delta l $是荷重增减4个砝码所引起的光标偏移量,则$ M $为4个砝码的质量。
\end{enumerate}

\subsection{实验结果与数据处理}

\subsubsection{数据记录}

\begin{enumerate}
    \item 钼丝长度$ L=578.9\,\mathrm{mm} $,其不确定度为$ u(L)=\sqrt{\frac{d^2}{10^2}+\frac{e^2}{3}}=1.159\,\mathrm{mm} $
    \item 钼丝直径数据记录详见表 \ref{钼丝直径测量数据}
    \item (此处读数估读所用最小精度为$ \frac d5 $)实验过程中加上两个100\,g砝码作为底码后,初始读数为$ l_0=1.05\,\mathrm{mm} $,此后累加与累减8个200\,g砝码时记录叉丝读数如表 \ref{增减砝码时叉丝读数数据记录}
\end{enumerate}

\begin{table}[H]
    \centering
    \caption{\textbf{钼丝直径测量数据}}
    \label{钼丝直径测量数据}
    \begin{tabular}{cccccccc}
    \toprule
    测量次数 &1&2&3&4&5&6& 平均值 $\bar{d}$ \\
    \midrule
    $d\ (\mathrm{mm})$ &0.178&0.180&0.170&0.176&0.180&0.176&0.1767\\
    \bottomrule
    \end{tabular}
\end{table}

\begin{table}[H]
    \centering
    \caption{\textbf{增减砝码时叉丝读数数据记录}}
    \label{增减砝码时叉丝读数数据记录}
    \begin{tabular}{cccccccc}
    \toprule
    $ \sum M\;(\mathrm g) $&$ \overline M\;(\mathrm g) $&$ \sum\bar l\;(\mathrm{mm}) $&$ \bar{\bar l}\;(\mathrm{mm}) $&$ \sum l_iM_i\;(\mathrm{mm\cdot g}) $&$ \overline{l_iM_i}\;(\mathrm{mm\cdot g}) $\\
    \midrule
    7200&900&15.15&1.89375&15175&1896.875\\
    \bottomrule
    \end{tabular}
\end{table}

\subsubsection{逐差法处理数据}
你好
\subsubsection{最小二乘法处理数据}
你好
\subsubsection{作图法处理数据}

根据表 \ref{增减砝码时叉丝读数数据记录} 中数据,以最小二乘法拟合目标函数 $\Delta l = am+b $,其中 $a,b$ 为待定常数,可以得到 $a= 9.17\times10^{-4}\,\mathrm{mm/g}$ ,如图:

\begin{figure}[H]
    \centering
    \includegraphics[width=\textwidth]{assets/2024-08-23_19-54-13.pdf}
    \caption{\textbf{作图法求杨氏模量}}\label{作图法求杨氏模量}
\end{figure}

由此计算得
	\begin{equation}
        Y=\frac{4gL}{\pi d^2k}=2.523\times10^{11}\,\mathrm{N/m^2}
    \end{equation}
与理论值的相对误差为 $9.70\ \%$.

\newpage
\section{霍尔位置传感方法测量杨氏模量}

\subsection{实验目的}
\subsection{实验器材}
\subsection{实验原理}
\subsubsection{霍尔位置传感器的定标}

霍尔元件置于磁感强度为$ B $的磁场中,再垂直于磁场的方向上加上电流$ I $,那么在与这两者垂直的方向上将产生霍尔电势差
\begin{equation}
    U_H=K\cdot I\cdot B
\end{equation}
其中$ K $为元件的霍尔灵敏度。若保持霍尔元件的电流$ I $不变,而使其在一个均匀梯度的磁场中移动时,输出的霍尔电势差变化量为

\begin{equation}
    \Delta U_H=K\cdot I\cdot\frac{\mathrm{d} B}{\mathrm{d} Z}\cdot\Delta Z
\end{equation}
上式中$ \Delta Z $为位移量。

\begin{figure}[H]
    \centering
    \includesvg[width=0.4\textwidth]{assets/梯度均匀磁场的实现.drawio.svg}
    \caption{\textbf{梯度均匀磁场的实现}}\label{梯度均匀磁场的实现}
\end{figure}

\subsubsection{弯曲法测杨氏模量}

\subsection{实验内容}
\subsubsection{注意事项}
\subsubsection{实验步骤}
\subsection{实验结果与数据处理}
\subsubsection{数据记录}

\newpage
\section{动态悬挂法测量材料的杨氏模量}
\subsection{实验目的}
\subsection{实验器材}

\newpage
\section{思考题与实验心得}
\subsection{思考题}
\subsection{实验反思与心得体会}

\newpage
\href{https://www.latex-tables.com/}{Latex Table Editor} 示例:

% \usepackage{tabularray}

\begin{longtblr}[caption={\bfseries 示例表格},label=tab:example]{
    hline{1,51} = {-}{0.08em},
    hline{2} = {-}{},
  }
   $x$& hello & $123.456$ \\
   $x$& hello & $123.456$ \\
   $x$& hello & $123.456$ \\
   $x$& hello & $123.456$ \\
   $x$& hello & $123.456$ \\
   $x$& hello & $123.456$ \\
   $x$& hello & $123.456$ \\
   $x$& hello & $123.456$ \\
   $x$& hello & $123.456$ \\
   $x$& hello & $123.456$ \\
   $x$& hello & $123.456$ \\
   $x$& hello & $123.456$ \\
   $x$& hello & $123.456$ \\
   $x$& hello & $123.456$ \\
   $x$& hello & $123.456$ \\
   $x$& hello & $123.456$ \\
   $x$& hello & $123.456$ \\
   $x$& hello & $123.456$ \\
   $x$& hello & $123.456$ \\
   $x$& hello & $123.456$ \\
   $x$& hello & $123.456$ \\
   $x$& hello & $123.456$ \\
   $x$& hello & $123.456$ \\
   $x$& hello & $123.456$ \\
   $x$& hello & $123.456$ \\
   $x$& hello & $123.456$ \\
   $x$& hello & $123.456$ \\
   $x$& hello & $123.456$ \\
   $x$& hello & $123.456$ \\
   $x$& hello & $123.456$ \\
   $x$& hello & $123.456$ \\
   $x$& hello & $123.456$ \\
   $x$& hello & $123.456$ \\
   $x$& hello & $123.456$ \\
   $x$& hello & $123.456$ \\
   $x$& hello & $123.456$ \\
   $x$& hello & $123.456$ \\
   $x$& hello & $123.456$ \\
   $x$& hello & $123.456$ \\
   $x$& hello & $123.456$ \\
   $x$& hello & $123.456$ \\
   $x$& hello & $123.456$ \\
   $x$& hello & $123.456$ \\
   $x$& hello & $123.456$ \\
   $x$& hello & $123.456$ \\
   $x$& hello & $123.456$ \\
   $x$& hello & $123.456$ \\
   $x$& hello & $123.456$ \\
   $x$& hello & $123.456$ \\
   $x$& hello & $123.456$
\end{longtblr}

\href{https://www.tablesgenerator.com/latex_tables#}{Create Latex Tables Online} 示例:

% Please add the following required packages to your document preamble:
% \usepackage{booktabs}
% \usepackage{longtable}
% Note: It may be necessary to compile the document several times to get a multi-page table to line up properly
\begin{longtable}[c]{ccc}
    \caption{ Create Latex Tables Online 示例}
    \label{tab:my-table}\\
    \toprule
    表头& 表头 & 表头 \\* \midrule
    \endfirsthead
    %
    \multicolumn{3}{c}%
    {{\bfseries Table \thetable :\ continued from previous page}} \\
    \toprule
    表头& 表头 & 表头 \\* \midrule
    \endhead
    %
    \bottomrule
    \endfoot
    %
    \endlastfoot
    %
     $x$ & hello  & $123.456$ \\
     $x$ & hello  & $123.456$ \\
     $x$ & hello  & $123.456$ \\
     $x$ & hello  & $123.456$ \\
     $x$ & hello  & $123.456$ \\
     $x$ & hello  & $123.456$ \\
     $x$ & hello  & $123.456$ \\
     $x$ & hello  & $123.456$ \\
     $x$ & hello  & $123.456$ \\
     $x$ & hello  & $123.456$ \\
     $x$ & hello  & $123.456$ \\
     $x$ & hello  & $123.456$ \\
     $x$ & hello  & $123.456$ \\
     $x$ & hello  & $123.456$ \\
     $x$ & hello  & $123.456$ \\
     $x$ & hello  & $123.456$ \\
     $x$ & hello  & $123.456$ \\
     $x$ & hello  & $123.456$ \\
     $x$ & hello  & $123.456$ \\
     $x$ & hello  & $123.456$ \\
     $x$ & hello  & $123.456$ \\
     $x$ & hello  & $123.456$ \\
     $x$ & hello  & $123.456$ \\
     $x$ & hello  & $123.456$ \\
     $x$ & hello  & $123.456$ \\
     $x$ & hello  & $123.456$ \\
     $x$ & hello  & $123.456$ \\
     $x$ & hello  & $123.456$ \\
     $x$ & hello  & $123.456$ \\
     $x$ & hello  & $123.456$ \\
     $x$ & hello  & $123.456$ \\
     $x$ & hello  & $123.456$ \\
     $x$ & hello  & $123.456$ \\
     $x$ & hello  & $123.456$ \\
     $x$ & hello  & $123.456$ \\
     $x$ & hello  & $123.456$ \\
     $x$ & hello  & $123.456$ \\
     $x$ & hello  & $123.456$ \\
     $x$ & hello  & $123.456$ \\
     $x$ & hello  & $123.456$ \\
     $x$ & hello  & $123.456$ \\
     $x$ & hello  & $123.456$ \\
     $x$ & hello  & $123.456$ \\
     $x$ & hello  & $123.456$ \\
     $x$ & hello  & $123.456$ \\* \bottomrule
\end{longtable}


\nocite{*}
\bibliography{re}
\thispagestyle{fancy}
\addcontentsline{toc}{section}{参考文献}


\newpage
\appendix
\titleformat{\section}{\large\centering\bfseries}{\thesection}{1em}{}
\titleformat{\subsection}{\large\centering\bfseries}{\thesubsection}{1em}{}

\section*{\huge\centering\bfseries 附录 A}\addcontentsline{toc}{section}{附录 A}\setcounter{subsection}{0}\renewcommand\thesubsection{A.\arabic{subsection}}

\subsection{支撑材料列表}

\begin{center}
  这里插入一张图片(类似思维导图那种)
\end{center}
\subsection{这里是我的第二节附录}
% 注意:listing环境中手动输入的代码需要顶格写

\begin{matlablisting}
% MATLAB code here
x = 0:0.1:2*pi;
y = sin(x);
plot(x, y);
xlabel('x');
ylabel('sin(x)');
title('Sine Function');
% ... (MATLAB code here,最好是插入文件)
% MATLAB code here
x = 0:0.1:2*pi;
y = sin(x);
plot(x, y);
xlabel('x');
ylabel('sin(x)');
title('Sine Function');
% ... (MATLAB code here,最好是插入文件)
% MATLAB code here
x = 0:0.1:2*pi;
y = sin(x);
plot(x, y);
xlabel('x');
ylabel('sin(x)');
title('Sine Function');
% ... (MATLAB code here,最好是插入文件)
% MATLAB code here
x = 0:0.1:2*pi;
y = sin(x);
plot(x, y);
xlabel('x');
ylabel('sin(x)');
title('Sine Function');
% ... (MATLAB code here,最好是插入文件)
% MATLAB code here
x = 0:0.1:2*pi;
y = sin(x);
plot(x, y);
xlabel('x');
ylabel('sin(x)');
title('Sine Function');
% ... (MATLAB code here,最好是插入文件)
% MATLAB code here
x = 0:0.1:2*pi;
y = sin(x);
plot(x, y);
xlabel('x');
ylabel('sin(x)');
title('Sine Function');
% ... (MATLAB code here,最好是插入文件)% ... (MATLAB code here,最好是插入文件)% ... (MATLAB code here,最好是插入文件)% ... (MATLAB code here,最好是插入文件)% ... (MATLAB code here,最好是插入文件)A
% MATLAB code here
x = 0:0.1:2*pi;
y = sin(x);
plot(x, y);
xlabel('x');
ylabel('sin(x)');
title('Sine Function');
% ... (MATLAB code here,最好是插入文件)
\end{matlablisting}

\subsection{这里是我的第三节附录}
你好你好你好你好你好你好

% Written by Bibby AI
\end{document}


% VScode 常用快捷键:

% F2:                       变量重命名
% Ctrl + Enter:             行中换行
% Alt + up/down:            上下移行
% 鼠标中键 + 移动:           快速多光标
% Shift + Alt + up/down:    上下复制
% Ctrl + left/right:        左右跳单词
% Ctrl + Backspace/Delete:  左右删单词
% Shift + Delete:           删除此行
% Ctrl + J:                 打开 VScode 下栏(输出栏)
% Ctrl + B:                 打开 VScode 左栏(目录栏)
% Ctrl + `:                 打开 VScode 终端栏
% Ctrl + 0:                 定位文件
% Ctrl + Tab:               切换已打开的文件(切标签)
% Ctrl + Shift + P:         打开全局命令(设置)

% Latex 常用快捷键

% Ctrl + Alt + J:           由代码定位到PDF
%


% Git提交规范:
% update: Linear Algebra 2 notes
% add: Linear Algebra 2 notes
% import: Linear Algebra 2 notes
% delete: Linear Algebra 2 notes
Preview

PDF Preview
Create an account to compile and preview